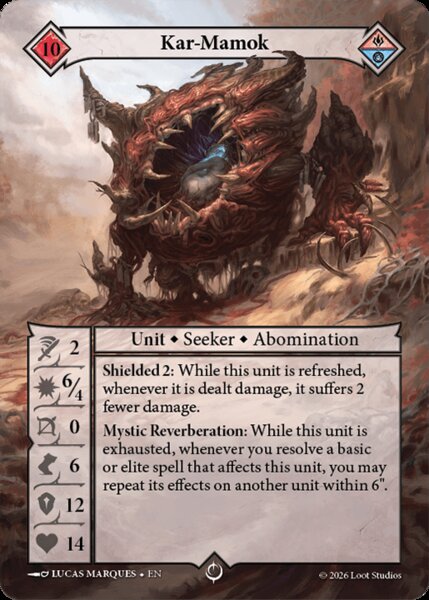
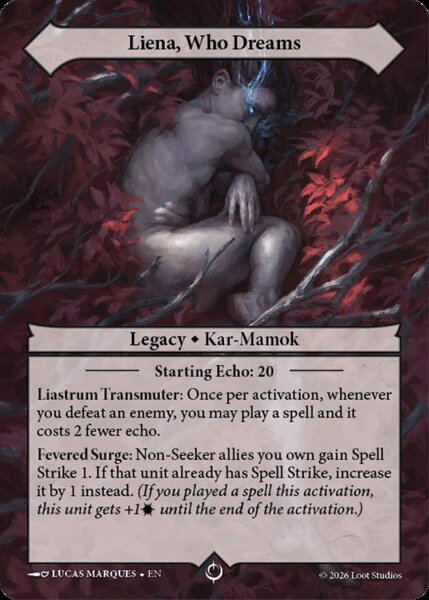
Kar-Mamok has seen three competing playstyles. Movement Shenanigans, Extra Actions and Spell Strike Matters. None of them are winning enough.
So what if you decided to just skip all the above styles and win on turn one?
This deck does exactly that. This deck will catch your opponents off guard and that alone is worth something.
Kar-Mamok sits at a 9% meta share and 41% win rate, the lowest among Seekers. This deck operates very differently than those that make up that bad win rate.
This list goes all in on speed. Each card pushes that gameplan forward and there is no room for a backup plan. No parachute, no seatbelt, no brakes. Just gas.
What is great about this deck is that if you pilot it right, when your opponent figures out what you are doing it will be too late for them. Every card either moves fast, helps your units move faster or clears a path for your units. Let’s break down how it works.
This deck has four units that can claim a Husk and have very high amounts of movement.
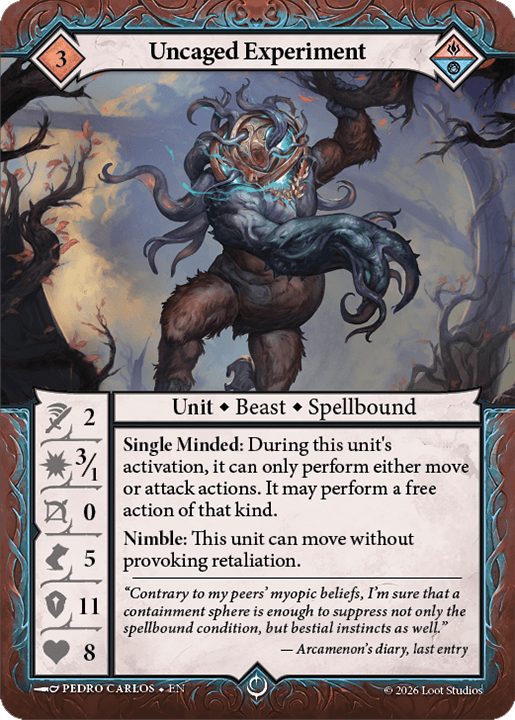
Uncaged Experiment moves three times per round, 15 inches of raw movement. This enables it to sprint across the board.
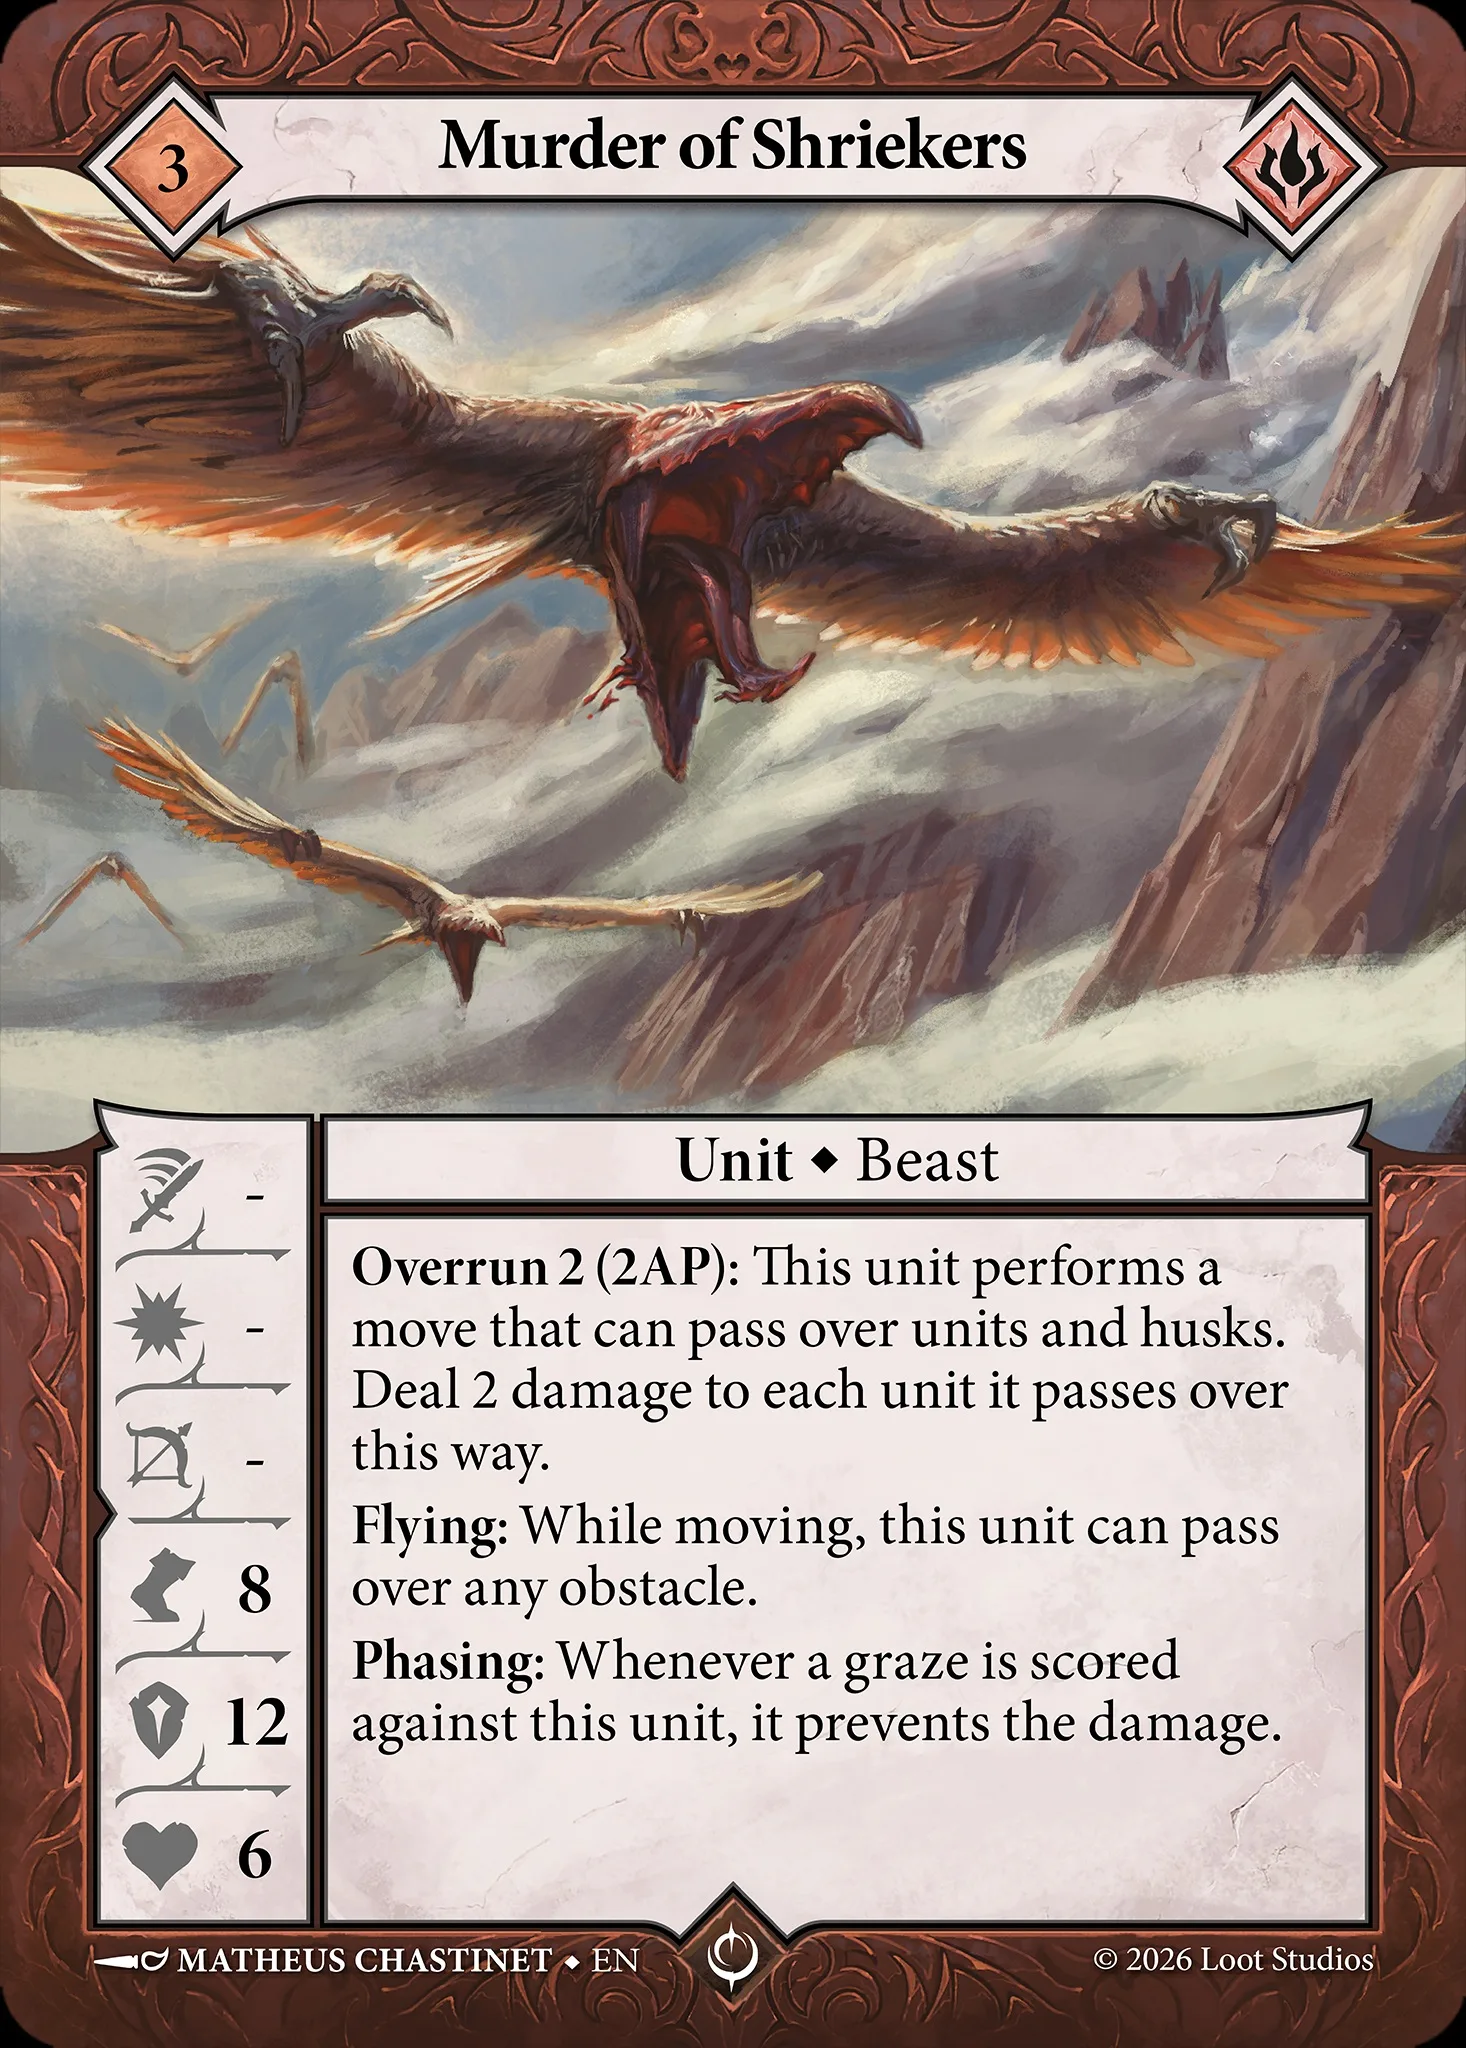
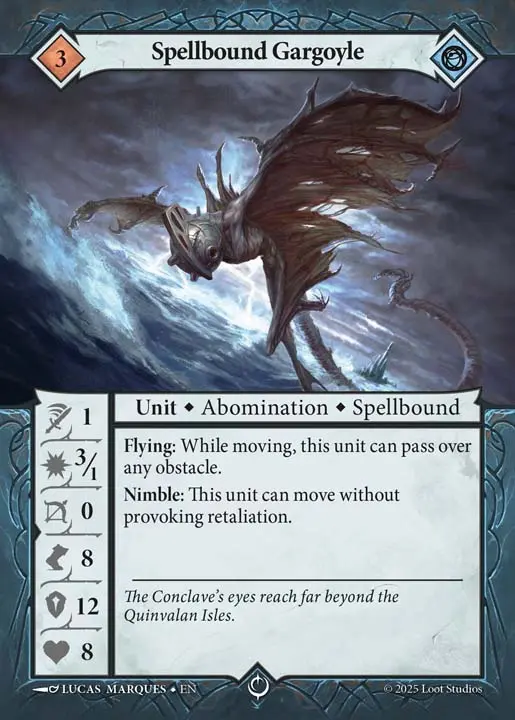
Murder of Shriekers and Spellbound Gargoyle both fly, so terrain and units barely slow them down.
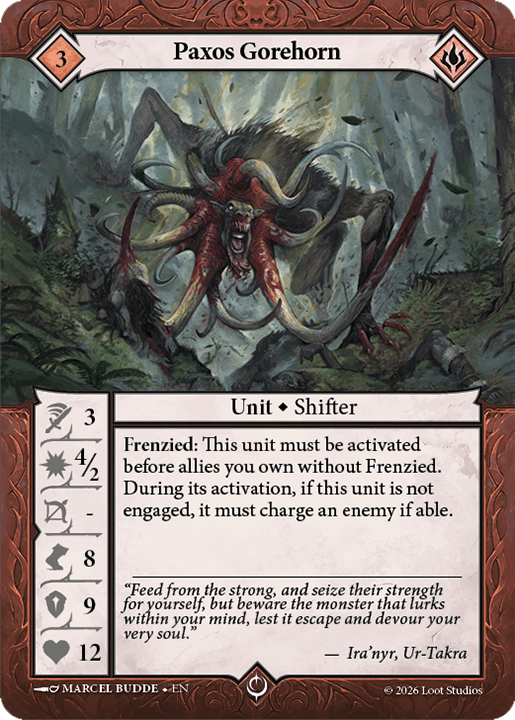
Paxos Gorehorn has an 8 inch move, plain and simple.
These units are able to move very quickly across the battlefield and grab the Husks. 3 of them move 8 inches which means if you can grant them an extra move they can reach 24 inches total, a full board's worth of movement.
There should not be any difficulty in reaching the 3rd or 4th Husk on the first round.
Four units reliably reach two or three Husks on their own. The rest of the plan relies on giving extra movement to your units either through spells or abilities.
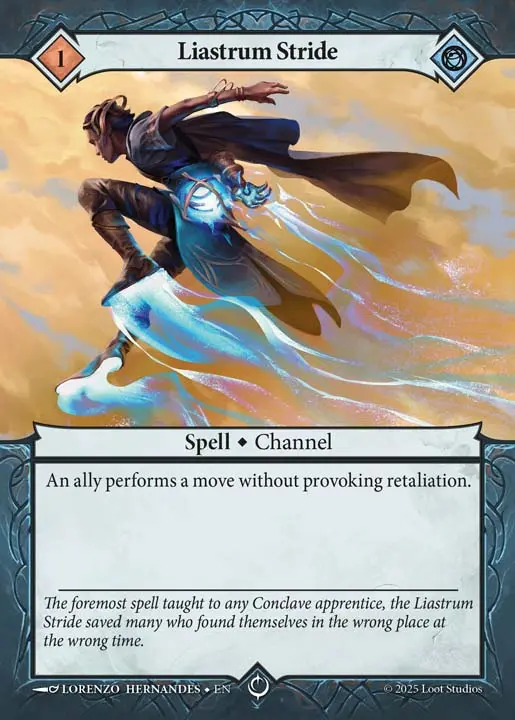
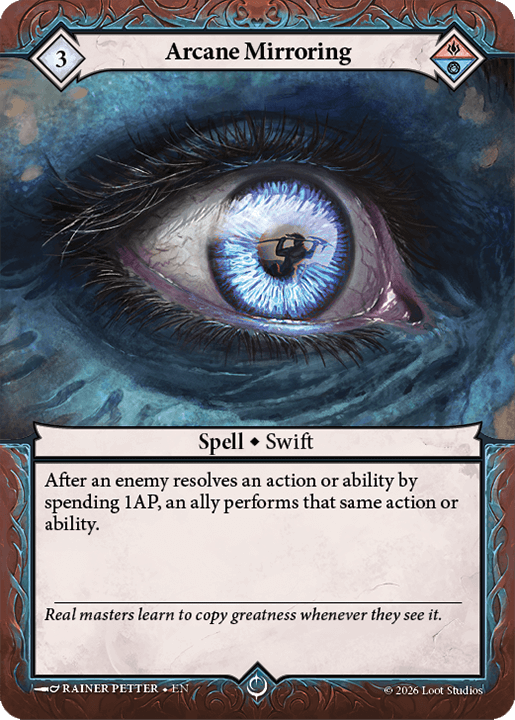
Liastrum Stride and Arcane Mirroring can be used to give units additional movement.
Liastrum Stride is cheap which makes it an easy include. Arcane Mirroring is strong because of its swift speed. It can be played in response to your opponent’s last unit’s activation and catch them off guard.
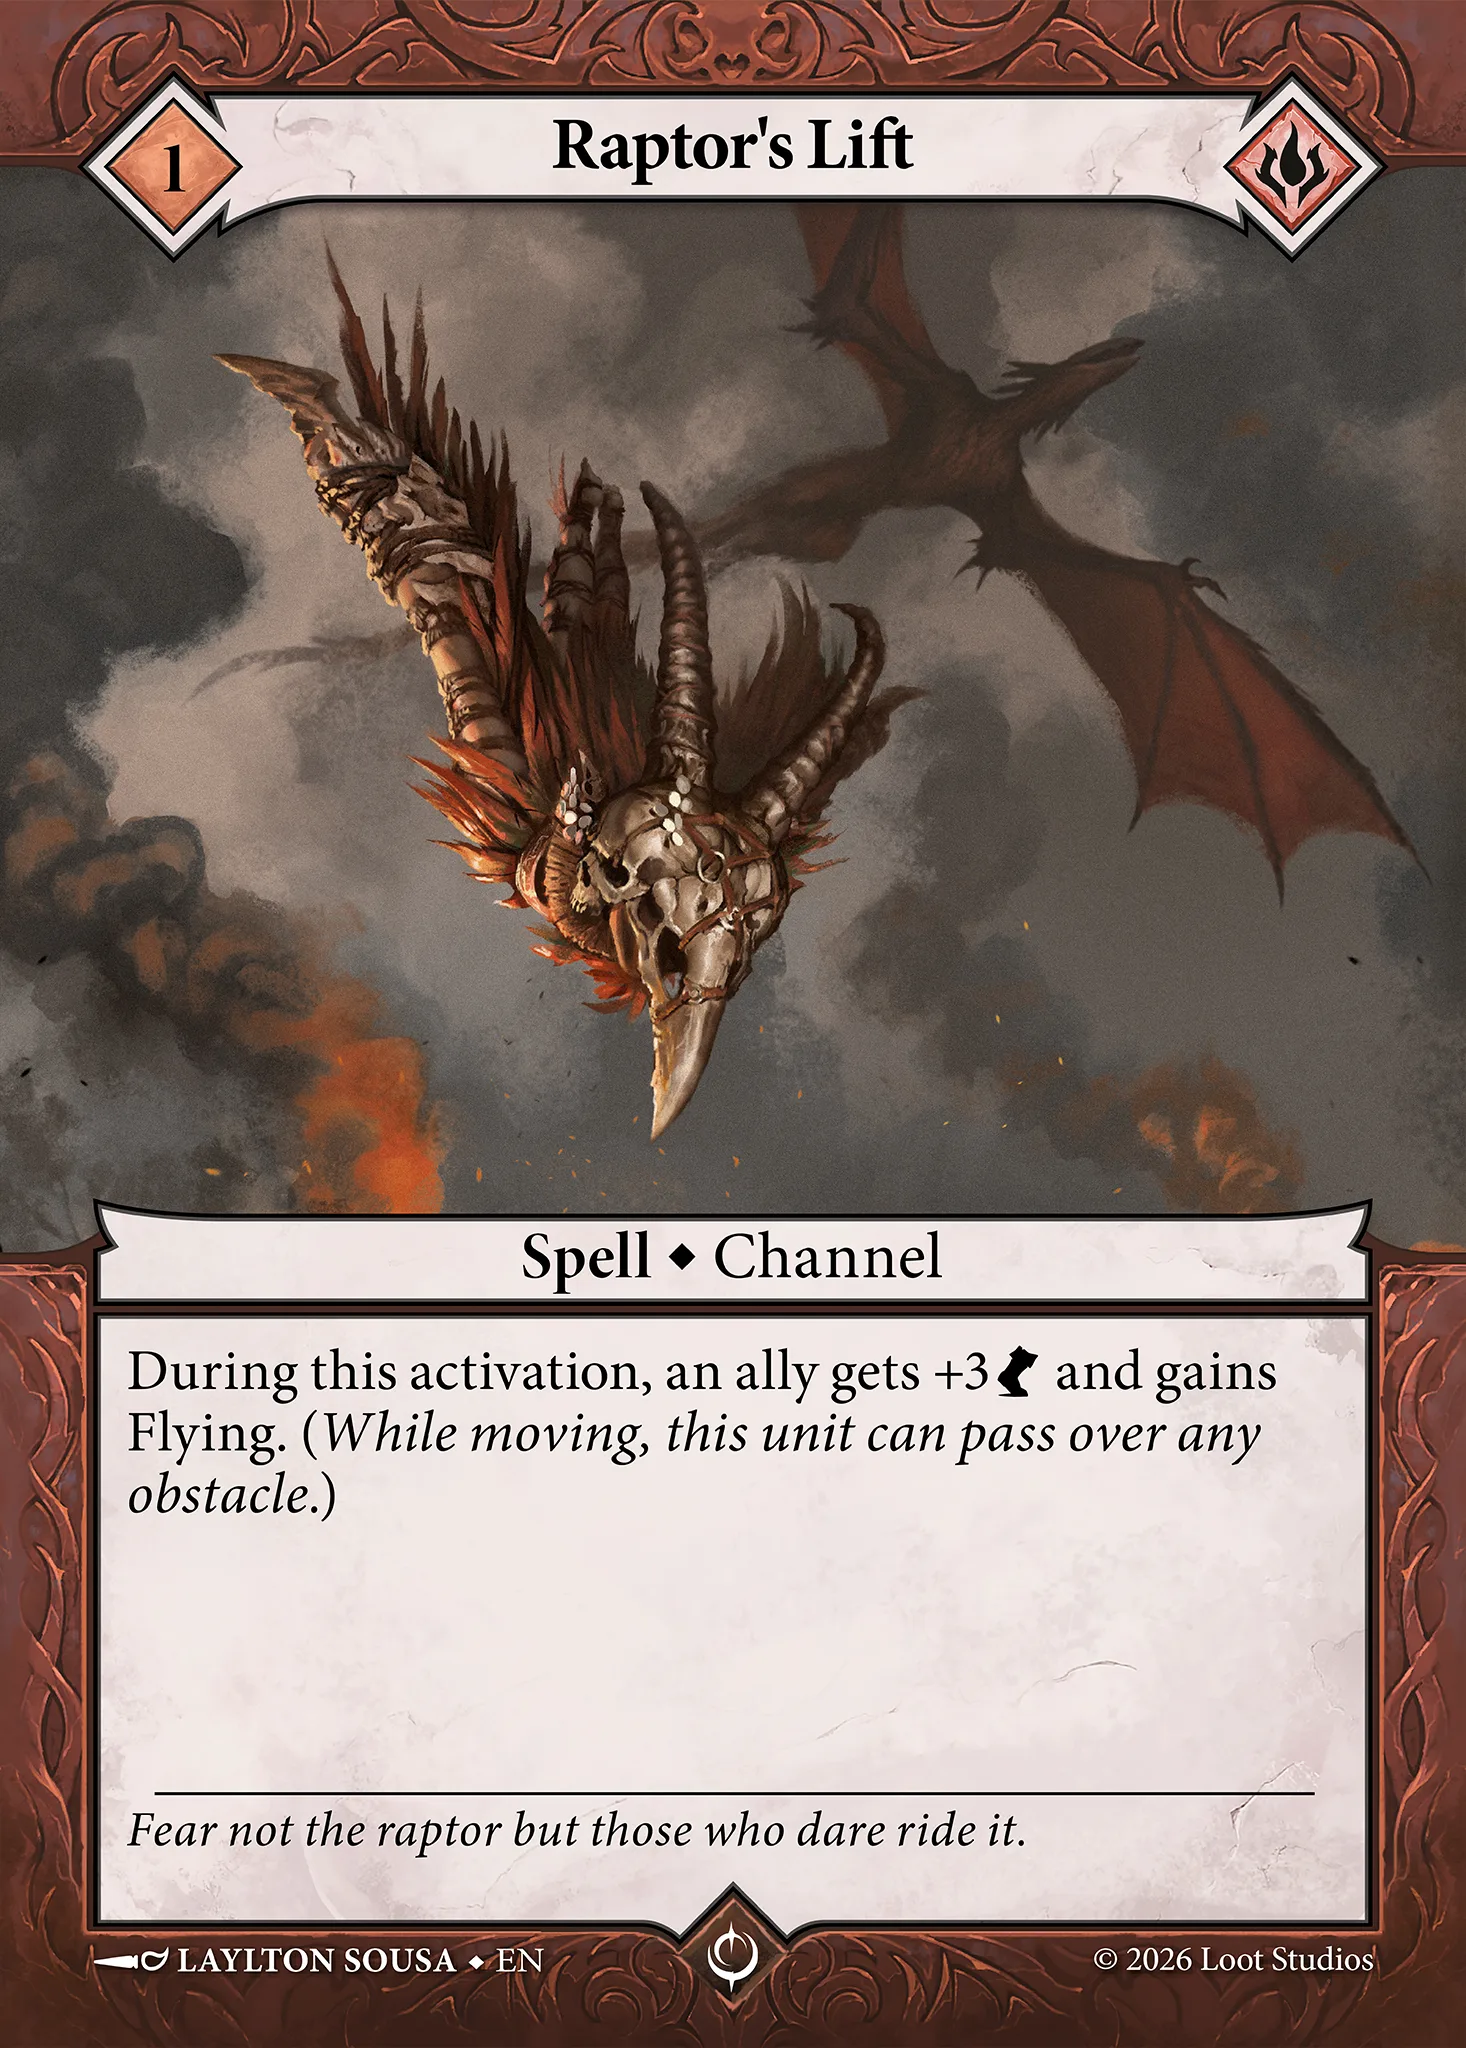
Raptor's Lift grants flying and additional speed. Combined the flying and speed boost give a unit a lot of extra movement as they can ignore terrain and move in a straight line directly toward the Husk.
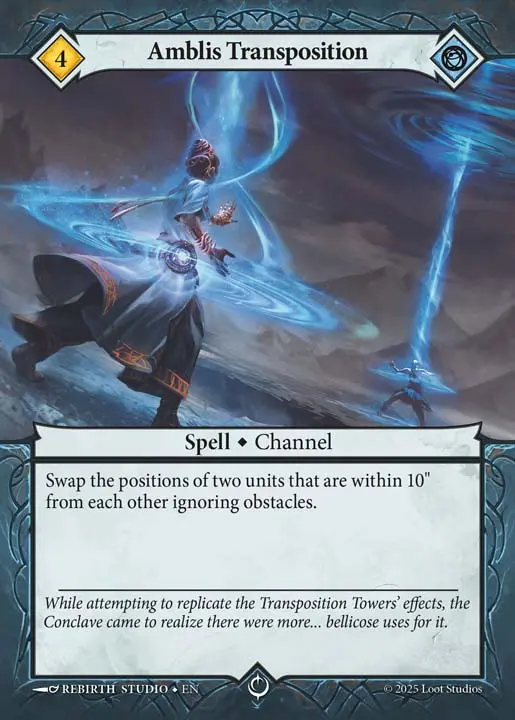
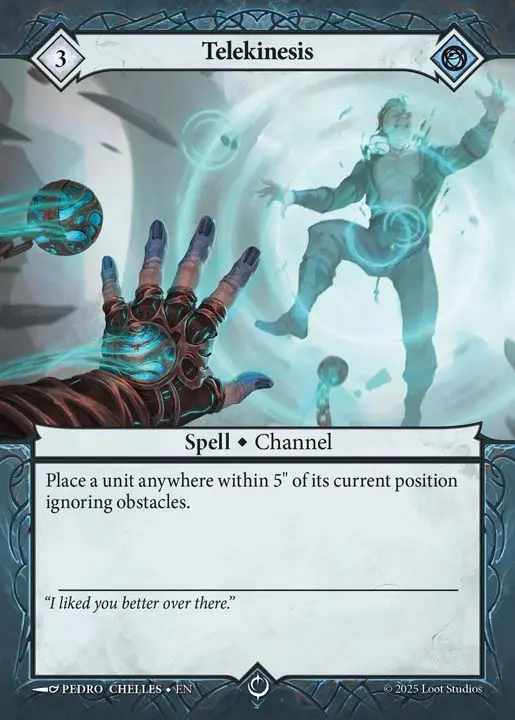
Amblis transposition and Telekinesis play two roles.
They allow you to push your units further up the board while also allowing you to interact with the opponent and potentially move their units away from a Husk.
Wait till you see your opponent’s face when you move a unit a few inches away from a Husk with your opponent’s unit nearby it.
Your opponent will sigh in relief because they know you are out of actions and their unit is safe beside the Husk… only for you to play Amblis Transposition and swap spots with their unit beside the last Husk to win the game.
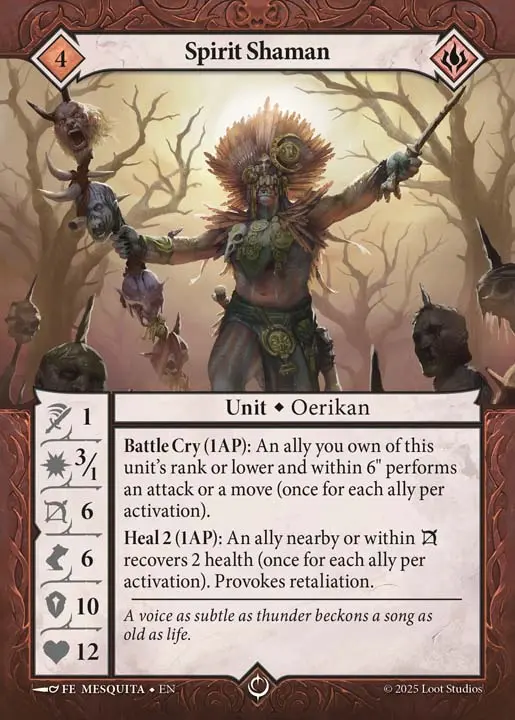
Spirit Shaman can claim a Husk too, but they are there as back up or enablers. They can grant extra movement through the Battlecry ability. If you were able to deploy a Husk within 6 inches of your deployment zone, you can give out a free move and grab a Husk turn one with this unit.
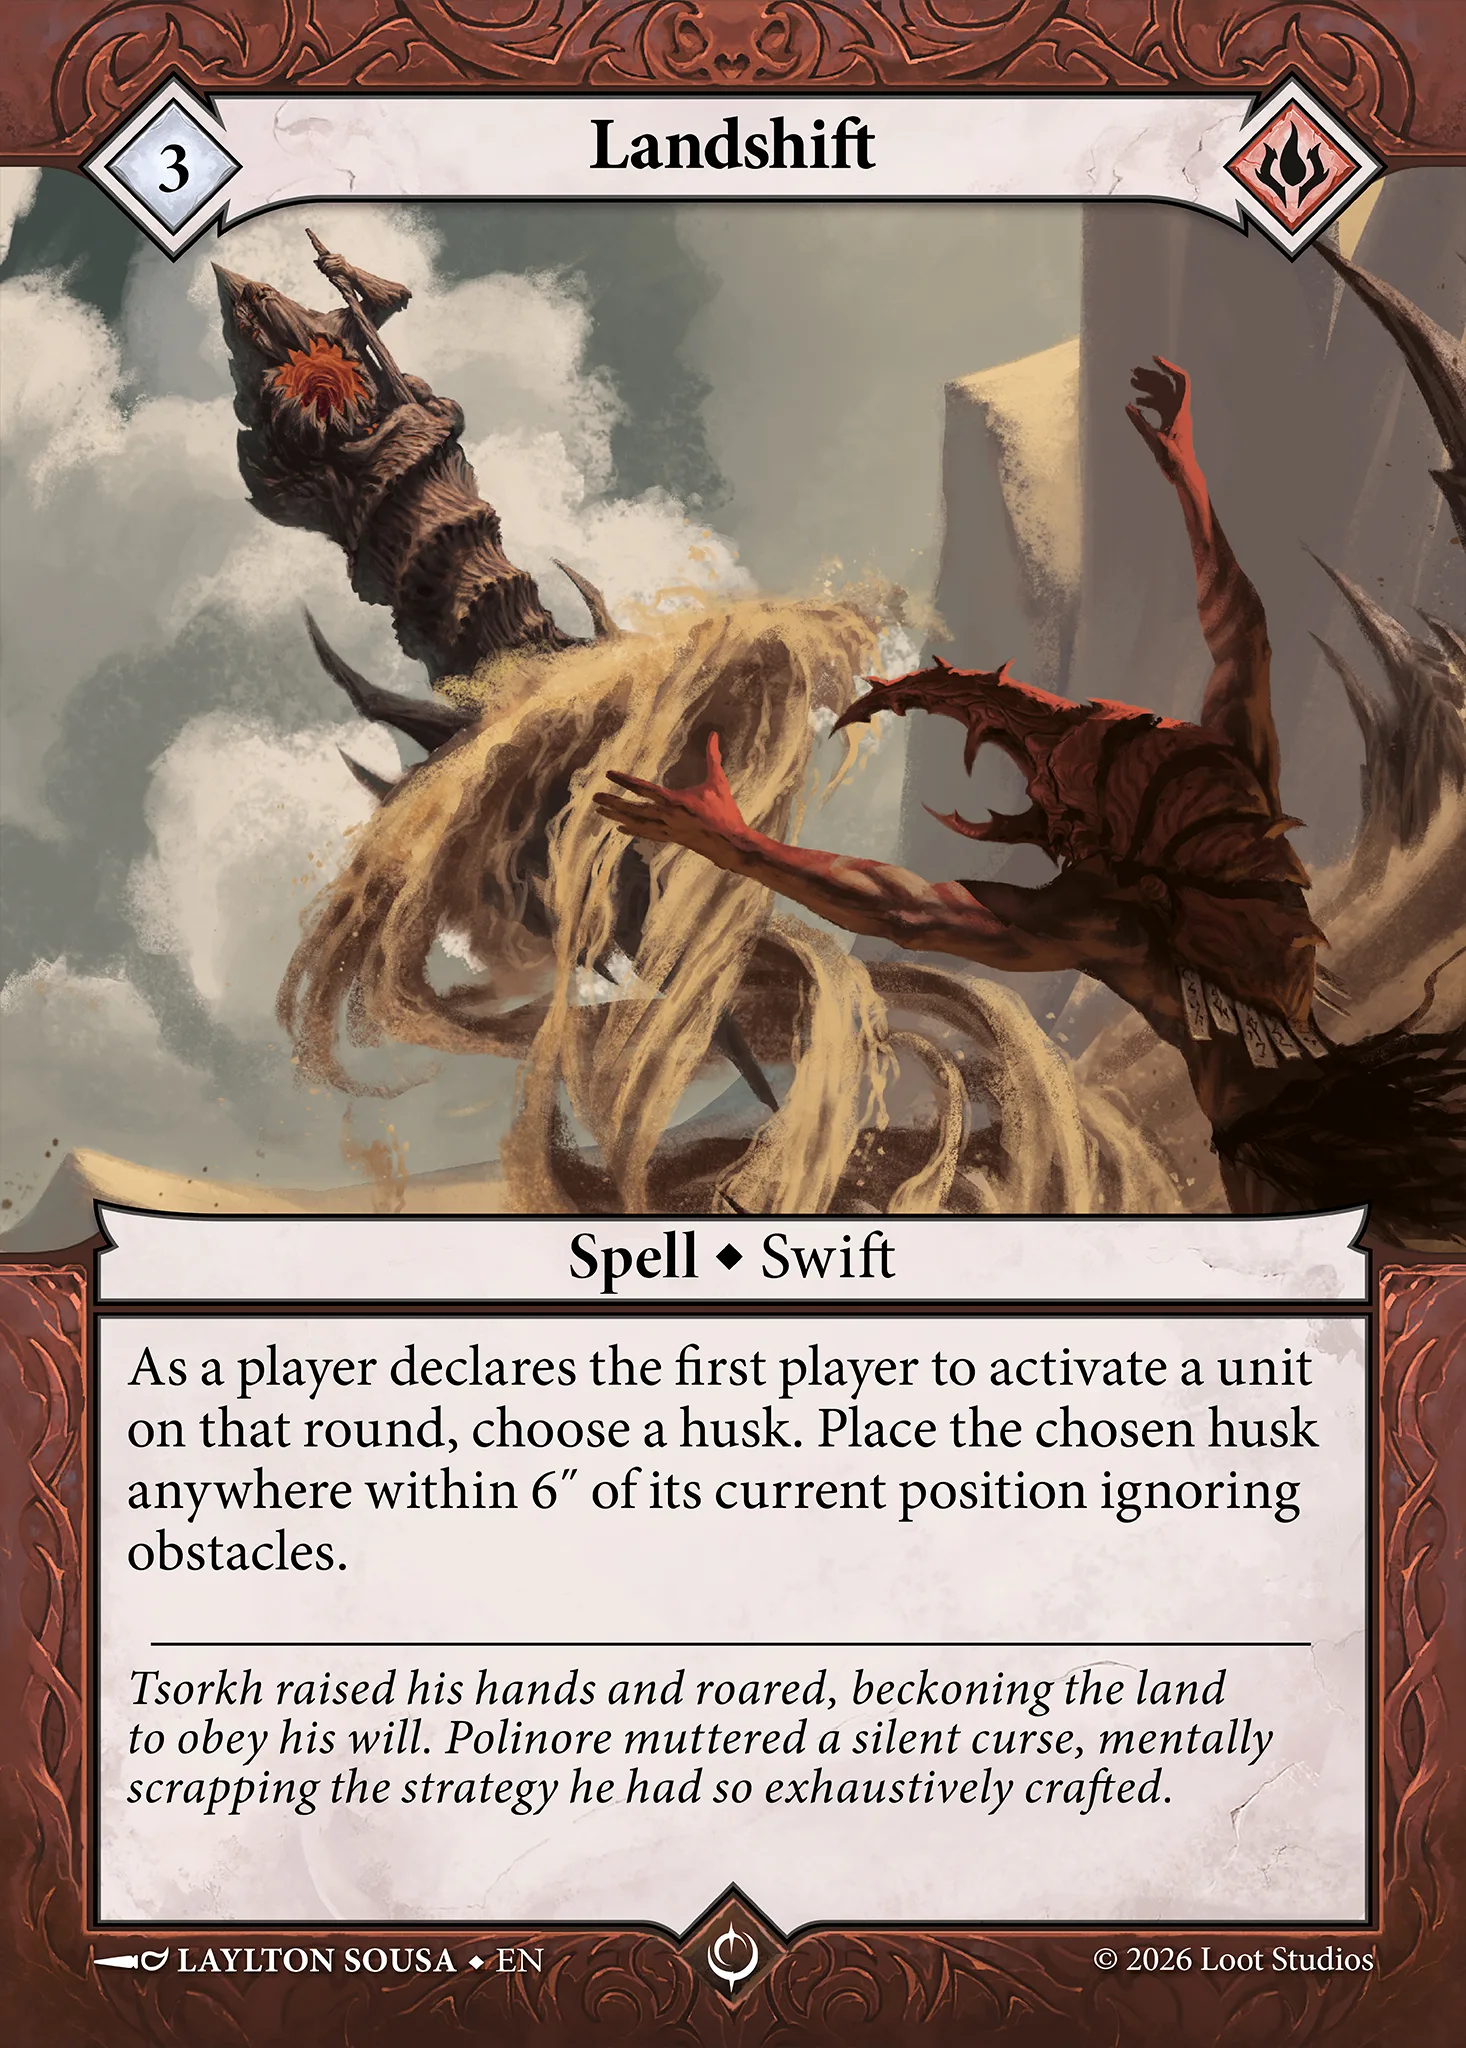
Landshift is a unique card. You have to play it before anyone activates, so it can telegraph to your opponent what you are trying to do early.
However, it can turn a bad Husk placement into a much more manageable one.
It can move a Husk out of reach of an opponent so they now need to panic and figure out a way to reach it. It will come in handy, you may not need to use it every game though, depending on Husk deployment.
Placing Husks is more important for this deck than others. You need to do a delicate dance with your opponent where you place your Husks in spots favourable to you while allowing your opponent to do the same.
Most opponents default to placing their own Husks near the center of the board.
This is because they want to ensure they can get at least 1-2 Husks on turn one from any deployment zone.
Placing a Hush dead center yourself hurts your game plan. It pushes the remaining Husk placements outward in a way that works against you.
Three typical formations come up that you need to be ready for.
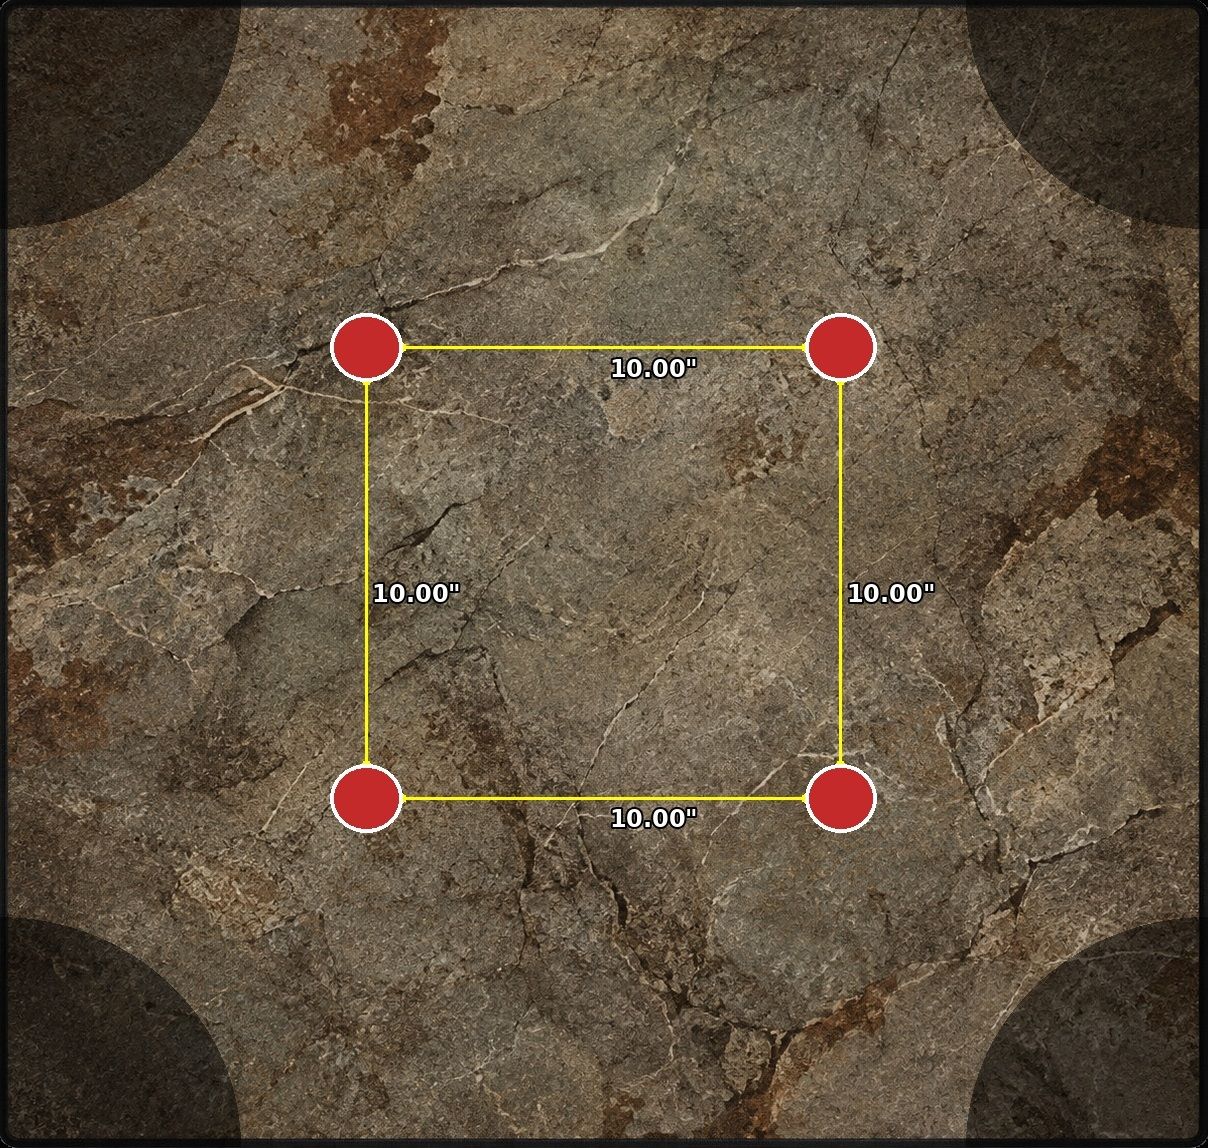
The best layout for this deck. Each deployment zone has one Husk fairly accessible to it. This gives your opponent a false sense of security as they feel they can guarantee at least one Husk by turn one.
The only challenge with this layout is the fact that the Husk closest to the opponent’s deployment zone may have two units contesting it. Landshift can come in handy here to move the Husk 6 inches deeper into the center of the board.
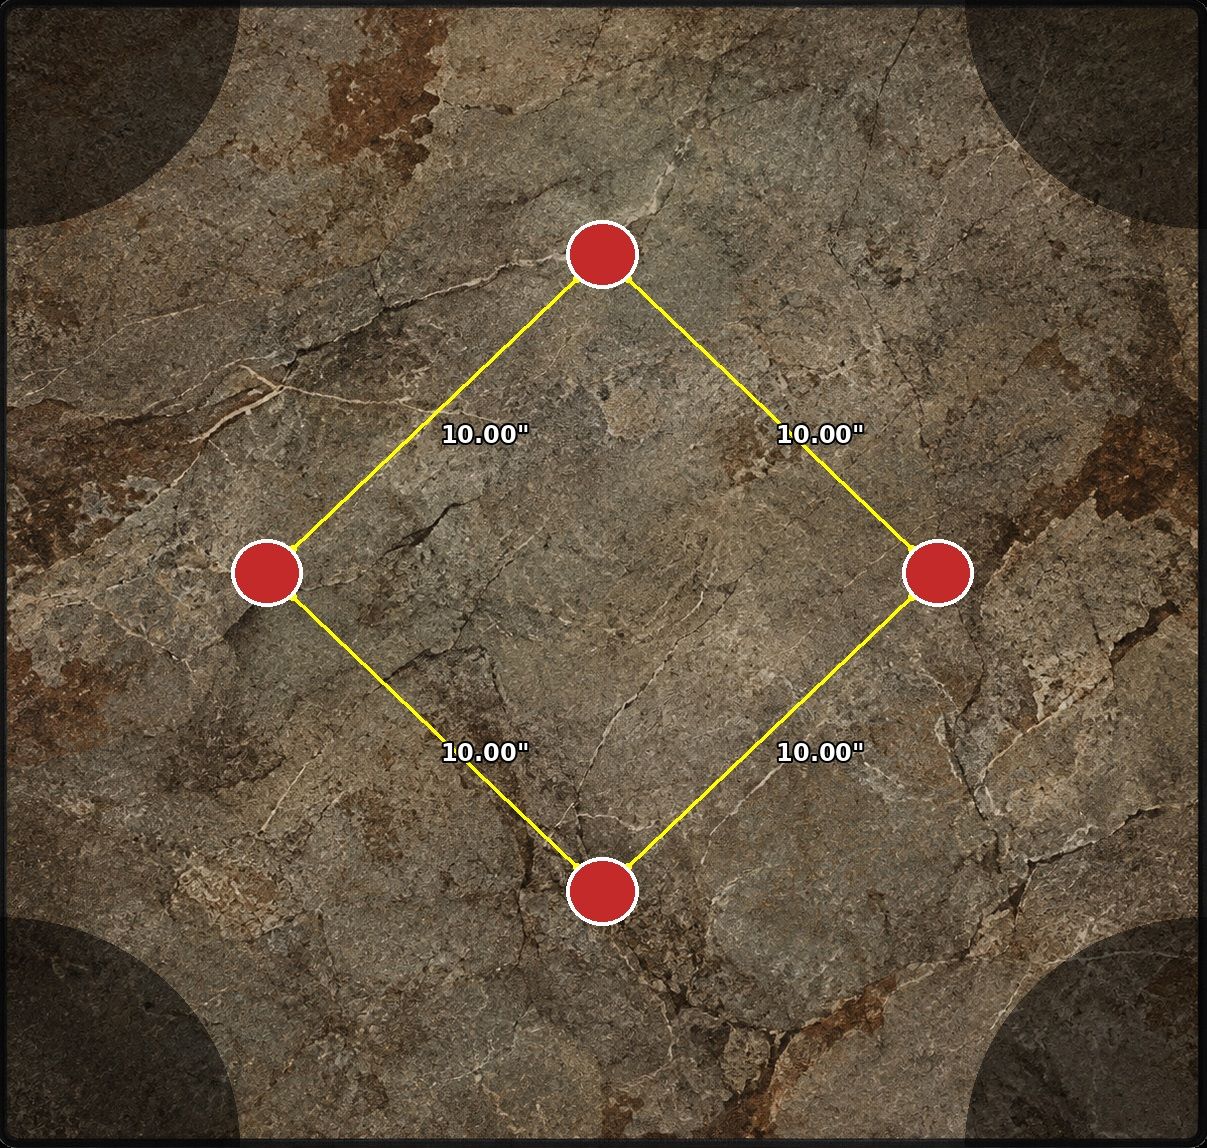
It maximizes distance from all deployment zones while staying fairly close to the center. It means that your opponent may not be able to context the Husks with multiple units or even only contest one Husk at all.
If your opponent opens the door to allow you to place Husks in this manner, take advantage of it.
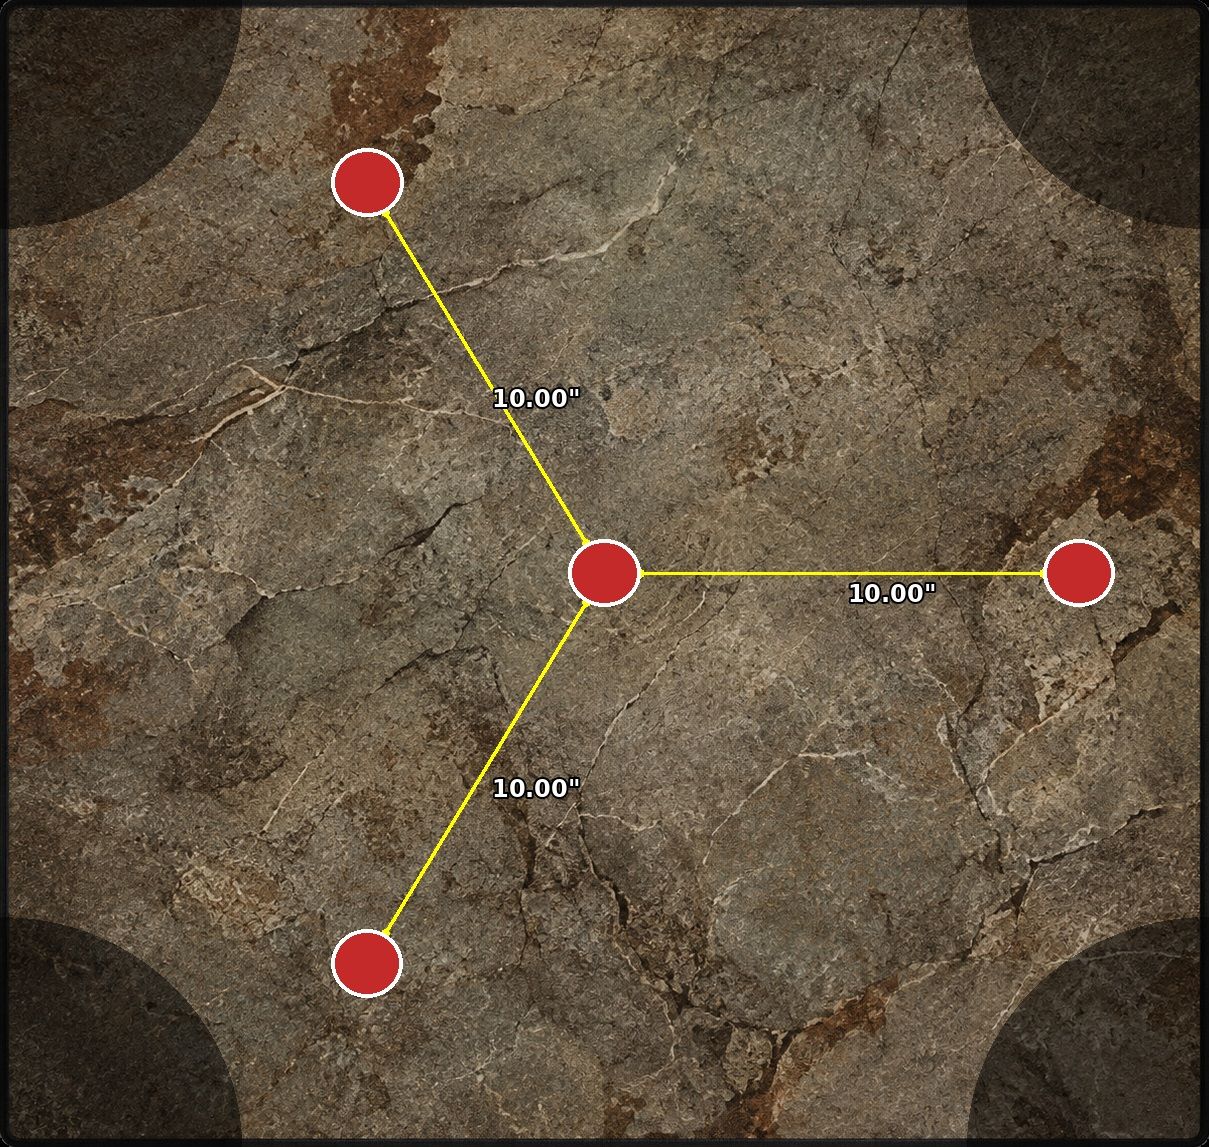
Not the worst layout, while also not the best. If your opponent is given one of the two deployment zones that has a Husk very close to it, that can create a headache for you.
Because the Husk is so close to their deployment zone, there is a higher likelihood that they can get multiple units on it to contest it.
On the flip side, you are almost guaranteed victory if your opponent is given one of the deployment zones with no Husks close to them. This allows you a free ticket to scoop them all up on turn 1 because your opponent cannot easily contest any of them.
When your game only lasts one round every decision matters!
The goal is not to place the Husks in spots you can reach, instead it is to make sure your opponent has space to place their Husks near the center. There is no spot where your units cannot reach.
The first Husk you place is the most important. You cannot place it directly in the center as that eliminates other Husks from being placed near the center all together.
Placing your first Husk dead center like this is a great example of what not to do.
If you have first Husk placement do not place it in the direct center of the board, instead aim for the diamond pattern. It is the easiest to contest Husks on and offers you the best chance of winning.
Your opening hand is almost as important as the Husk placement. The ideal hand is 4x fast units and 2x movement spells (with one extra card to bid away).
The plan can work with 3x units in hand, but it leaves you with almost no echo to spend on critical movement or interaction spells since you need to spend 10 Echo on Kar-Mamok.
You want to see 1-2 of Spellbound Gargoyle or Murder of Shriekers. Flying is great asset in this deck.
Paxos Gorehorn and Uncaged Experiment are almost identical. They do a really good job at grabbing the 2 easier to grab Husks that are within 16 inches of your deployment zone.
In your opening hand you are looking for one of these cards to help ensure your units reach each Husk easily.
It can surprise your opponent as they may think they are safe from you capturing all of the Husks turn 1, only to have you play this and seal the deal.
Prioritize moving units to the closer Husks first. There is no reason to telegraph what you are doing to your opponent early.
Once you have moved near the closer Husks, position your units to be primed to grab the final ones. This may involve staging a unit a short distance away from the last Husk because it is out of movement.
Sequencing matters here. If you know you need to cast a channel to move your unit in range of the last Husk, do so on the second to last activation. This gives you an opportunity to respond to your opponent and potentially play a game winning telekinesis.
If you wait till the last activation to then play your movement spell, you will be out of opportunities to play the ones that interact with your opponent.
No plan survives contact with the enemy, neither will this one.
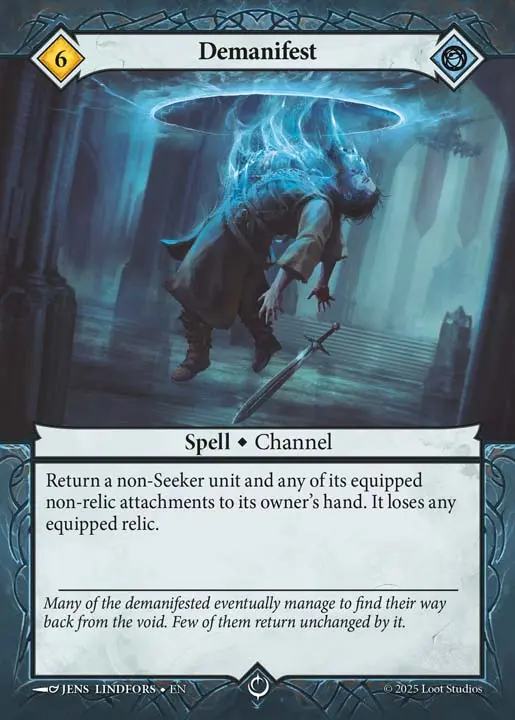
You will need to move your opponent’s units off of the Husks closest to their deployment zone. Amblis Transposition, Demanifest and Telekinesis are great ways to move units to a different position or even remove them from the board.
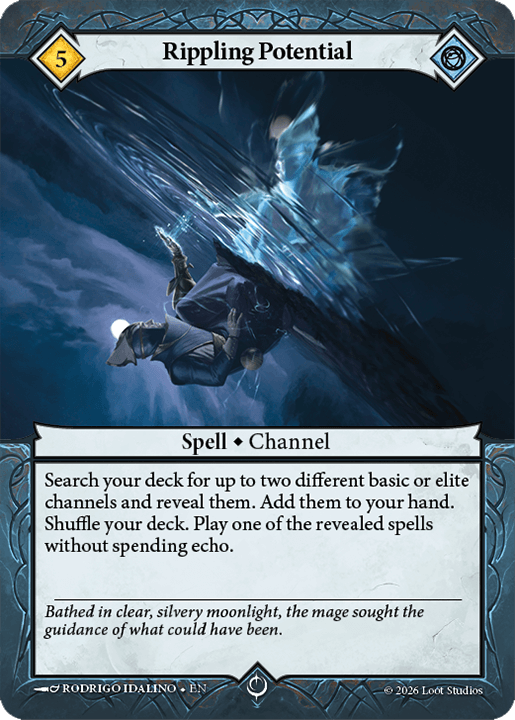
Rippling potential is a great spell as it allows you to get what you need and another spell. If you sequence it properly it is two spells that guarantee you the win.
Grab a Liastrum Stride and a Telekenisis. Play the Liastrum stride for free and then have the Telekinesis ready to go to remove your opponent’s unit from the Husk.
Landshift is a good way to interact with the opponent, but it is less of a sure thing than other spells. It forces you to play it before anyone has activated units.
While it can come in handy to guarantee a win, it also may just move the Husk 6 inches and cause your opponent to move a little further than they originally planned.
This deck does not tolerate half measures. If you are not willing to commit fully to the plan, do not pick up these cards. A cautious Kar-Mamok pilot loses to this list's own game plan just as easily as an opponent does.
Three specific mistakes will end your game before it starts.
If your opponent can get two units onto a Husk you were counting on, Telekinesis will not save you. It removes one creature, not two. Measure how far your opponent’s units can move before committing to a line, not after.
Know, before you deploy, whether your fast units can actually reach their assigned Husks and whether your movement spells can close any remaining gap.
Finding out mid-round that you are short by an inch is how a 4 Husk plan quickly becomes a 3 Husk plan, and that is not a win.
Play your interaction, especially Telekinesis, as late as possible. Casting it early hands your opponent free information about your plan and gives them a full activation or two to find an answer. Wait until your last activation.
It is important to make sure you can play your interaction spells on your last activation too. If you save your movement spell to the last activation and you do not have an opportunity to play Telekinesis to interact with your opponent then you are out of luck.
Sometimes the full sweep does not come together.
Maybe your opponent had a well timed counterspell for your critical movement spell, maybe your opponent's deployment denied a fourth Husk, maybe you kept a hand that could only reach three.
Three Husks is still a strong position.
There is a backup plan in case this gets interrupted. Claim what you can and retreat your units back toward your own deployment zone.
You are only short 10 Mastery, so your opponent now has two bad options: throw their units at you to try to close the gap, which is exactly what you are now setting a trap for or sit back and lose slowly as you keep building up your force and resources and win on the game going to time.
Either way, the pressure has flipped. You are no longer the one racing the clock, your opponent needs to find a way to win now.
Kar-Mamok's turn-one plan is vulnerable to Seekers built around interaction, and Morrida, Polinore, and Londriel are the three to watch for, with Londriel in particular leaning hardest into counterspell density.
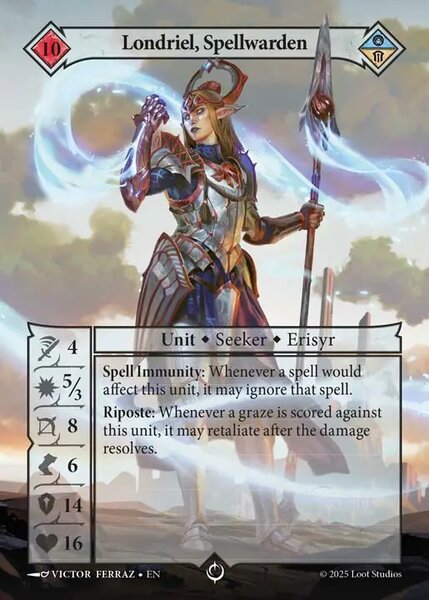
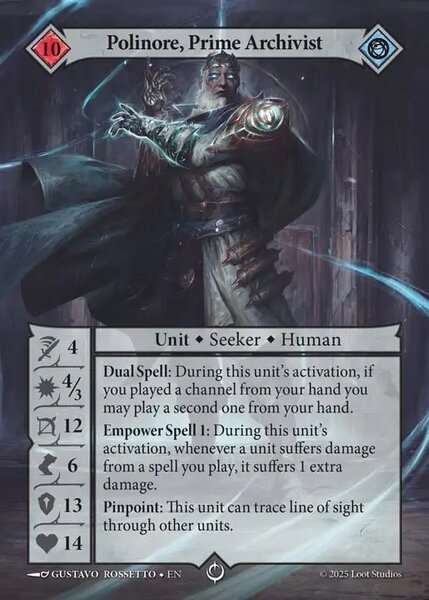
Against these matchups, the baseline plan does not change: still attempt the turn one win. If your opponent has a counterspell you force them to use it otherwise they lose the game. If they don’t have it you win, plain and simple.
If you are playing a very experienced Londriel player, you may decide to sideboard in some cards in expectation of a counterspell. Bringing in more units and pulling out some of the weaker movement spells allows you to still grab three relics and retreat to safety while you wait for your opponent to come to you.
To succeed, this deck needs 4 units and 1-2 movement/interaction spells. What does that actually look like?
There is 65% you have 4x units and 1x movement based spell in your opening hand. An 80% of that if you mulligan because you didn’t see it in your first 7 cards.
If you pay 12 Echo for 4x fast moving units and 4 more Echo for a movement spell and an interaction spell you are left with 4 echo at the end of round 1. (8 Echo for round 2)
You won’t be able to deploy Kar-Mamok on turn 2, but on turn 3 when your opponent has caught up to you back at your deployment zone you can now deploy your 6/4 damage dealer to close out that 10 Mastery gap.
Kar-Mamok currently sits at a 41% win rate and has not been solved. This deck may very well be a strategy that helps turn this win rate around.
Being able to grab 3 relics turn 1 consistently and regrouping back at your deployment zone as you build up your force is a solid strategy on its own.
Having the opportunity to win turn 1 as well is a great thing to have available to you.
Give this deck a try, tune the sideboard against your local meta, and see what it does. I guarantee you will have a good time.
Thanks Austin for your help with this!
If you want to read about more interesting decks you can find some here:
Malediction's First Combo Deck
These findings are hereby entered into the Grand Archive.