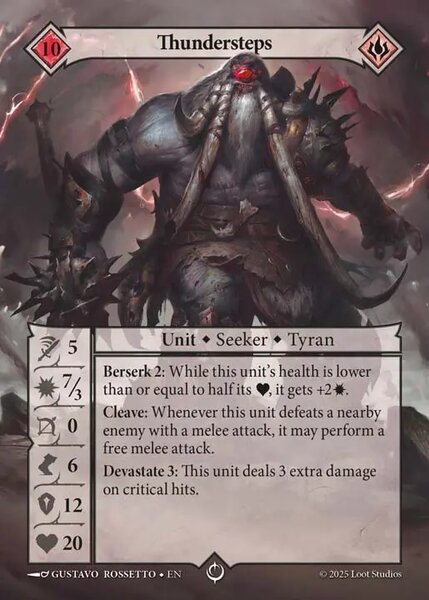
Thundersteps sits at 12% of the meta right now, with a 46% win rate. A win rate like this doesn’t strike fear into your opponent the way his playstyle should.
There are few seekers like Thundersteps, on the surface they seem simple and easy to hand to a new player on day one, with a floor so low anyone can win a couple of games on instinct alone.
What most players miss is the second half of the story, that his ceiling is very high, and most players never go looking for it.
Thundersteps is built for combat and damage dealing. His 7 damage on a hit is the highest of any unit. 20 health ties him for the highest in the game giving him the needed survivability to stick around for multiple fights.
His kit is all built to reward the same thing: Attack. Berserk 2 makes you even more dangerous in the mid to late game. Cleave Is the spice that makes him so dangerous, defeat a unit and you can make a free attack. Devastate 3 Is nice, but at only a 5% chance of happening, it is not very reliable and not something you can count on.
None of these want him standing still and safe. All three want him bleeding, charging, and swinging into more than one target.
The stat line alone does more work than most seeker’s stats and abilities combined, but if you use his abilities well, you can start to chew through your opponent’s units with ease.
Cleave is the ability that your opponent fears. On most units, a "kill one thing and get a free attack" ability is either a lot of work to setup or not super impactful.
On Thundersteps, charging into two units, killing the first, cleaving into the second and either killing it or critically wounding it is not difficult to do at all.
Berserk is a double edged sword for your opponent. They want to deal damage to him, but by doing so they are making him more dangerous with every hit. Getting to half health is easier than you think through terrain and relics as well.
7 damage is a dangerous number, 9 (+2 from Berserk) is very deadly as that allows Thundersteps to one shot 8 health units (10 health units on a charge!). Getting him to half health means he gets even scarier, not weaker.
Devastate is a great ability, but with a 5% chance of triggering don’t count on it happening often. When it does it can blow your opponent out, but that is not something you should be building your gameplan around.
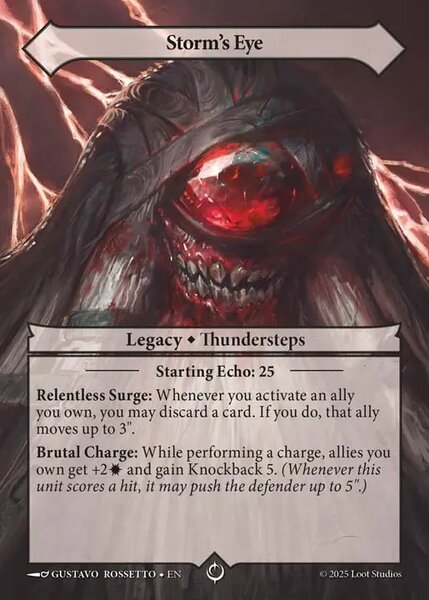
Thundersteps' legacy is what really enables dangerous play patterns against your opponent. Relentless Surge allows you to discard a card and move a unit 3 inches. This is a great tool to position a unit for a charge, get them into close combat or setup another play all for zero echo.
Speaking of setting up a charge, Brutal Charge makes your charges more deadly and allows you to push your enemies around the board with knockback.
The power of this legacy ability cannot be overlooked. Often charging is seen as a weaker play than making two attacks into a unit. This is because you spend your actions to get into engagement with the enemy and only get one chance to damage them, while your opponent gets two chances to hit you back. Meaning charging is not always the best option.
This ability mitigates that downside.
Charge an enemy unit, deal an additional 2 damage (counts for both hits and grazes) and if you hit, push them away so they are out of engagement range and cannot hit you back. If you graze, you can build your list to handle the opponent’s attacks and survive these hits to continue to pressure your opponent.
He's at his best against decks built from cheap, low-health units; anything running a swarm of small bodies. Every cleave chains into another cleave, every charge does real work, and the math tilts hard in his favor.
Thundersteps’ greatest strength is applying pressure to the opponent. Utilizing extra actions or positioning spells to force your opponent to panic or spend resources to save their units instead of killing yours.
He's at his worst against decks that stack protection and damage-absorption on tanky units. Doing 10 damage on a crit feels great for exactly as long as it takes your opponent to remind you that it will be absorbed by a different unit or completely prevented through a spell.
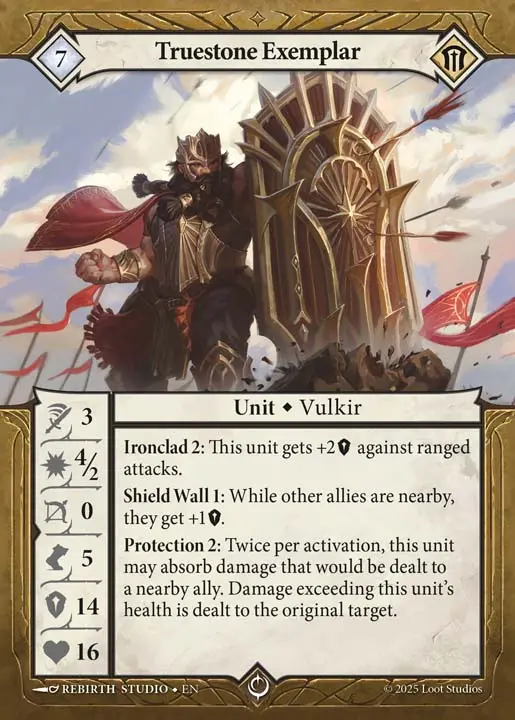
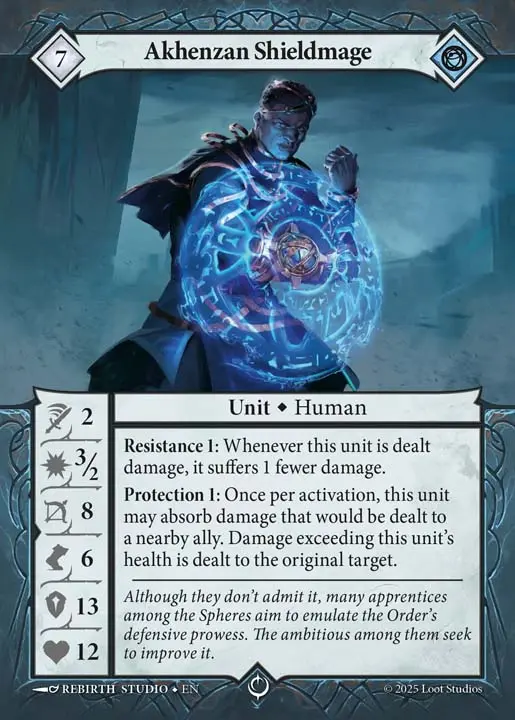
Against that kind of wall, the answer isn't a bigger single hit; it's utilizing the knockback to reposition the protection units and isolate them from the units they are protecting.
The Malediction team’s shorthand for playing him is "ABCs" — Always Be Charging. Charging on reflex, every single activation, is how new players lose with him. Charging with intent, at the right target, is how he wins games.
Success with Thundersteps is all about how fast you can count to 40. If you can grab 2 relics and then kill 20 mastery worth of units by turn 2-3 you have a pretty good chance of winning.
If you can't do that you need to either get creative or mulligan that hand away. You will win more games with Thundersteps if you stop to do some math before you begin.
You do not have the Luxury to slow the game down. You need to be thinking about how many points you need to win and how you kill the units needed to win the game this turn, or get as close to it as possible this turn. This means paying attention to mastery values of units, and how many hits each unit will take to kill.
Early game the goal is to grab a relic or two and setup some charges or points of engagement on the board. Thundersteps needs to engage the opponent, which means they know you are coming to them.
However, that doesn’t mean you need to engage them mindlessly, you can make sure you engage them on your terms.
Thundersteps’ plan excels when he is picking apart the enemy and isolating units to defeat. Using the Storm’s Eye ability Brutal Charge can help isolate units to separate them from the support they need to stay alive.
Activating other units or playing damage dealing spells before Thundersteps activates is a great way to trigger Cleave more reliably.
Having Thundersteps swoop in and steal a kill on a damaged unit to then get a free attack is a great way to chew through our opponent’s units.
Mid game is really turn 2. You spent the deployment phase and 1st turn setting everything up for the first opportunity to engage the enemy and start picking away at their units.
The critical decisions of this deck often need to be made early. Do you have enough pressure to really hinder your opponent’s gameplan? Can you reliably kill 2-3 units in the second round?
If the answer is no to any of these questions you may need to rethink your deck building or mulligan that starting hand away.
The late game is turn 3 and 4. To prevent losing steam at this point in the game you need to be surgical in who you target with your units.
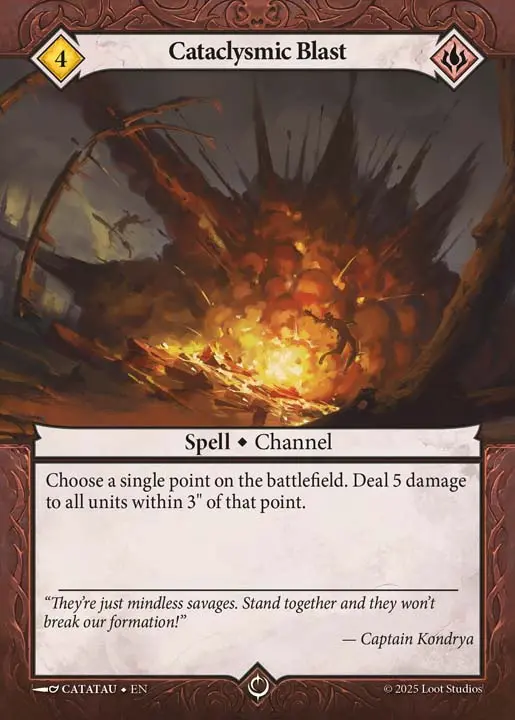
Spreading your damage out does not end well for Thundersteps. Using direct damage spells or Area of Effect damage dealing spells is critical to weaken units before charging into them to guarantee the kill.
Sadly, the game length is not on your side. The longer the game goes, the more likely your opponent can stabilize and hold your attacks at bay.
Thundersteps’ Legacy, is built to solve the one problem every aggressive seeker runs into: charge in, and you've just handed your opponent a free double-attack back at you.
Brutal Charge removes that problem. Charging deals extra damage that turns a graze into nearly the same amount of damage a hit would have dealt, while also pushing the target away after the hit. This forces them to spend an action just getting back into engagement with you.
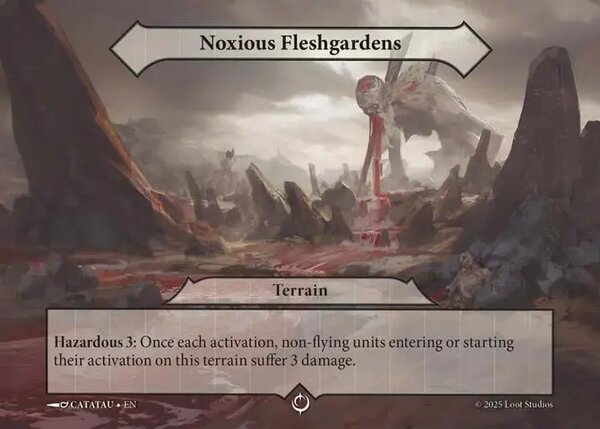
Noxious Fleshgardens punishes bad positioning directly. Anything that moves into or through it takes damage, which locks huge sections of the board off to small, low-health swarm builds and lets you dictate where the whole game happens even before a single knockback connects.
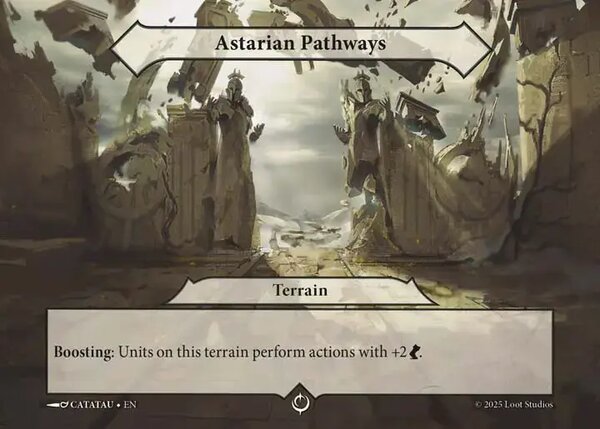
Astarian Pathways goes the other direction, boosting speed to extend Thundersteps’ or other units' threat range further. Both offer different advantages and whichever you choose really comes down to play style and deck build.
A few specific cards do a ton of work in the deck.
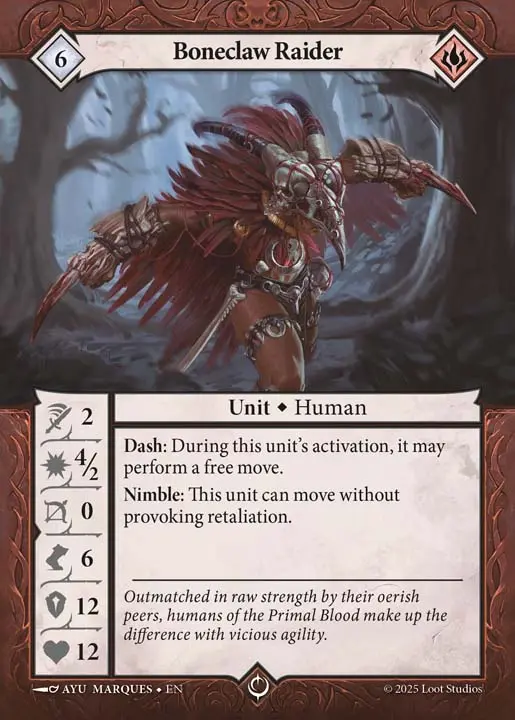
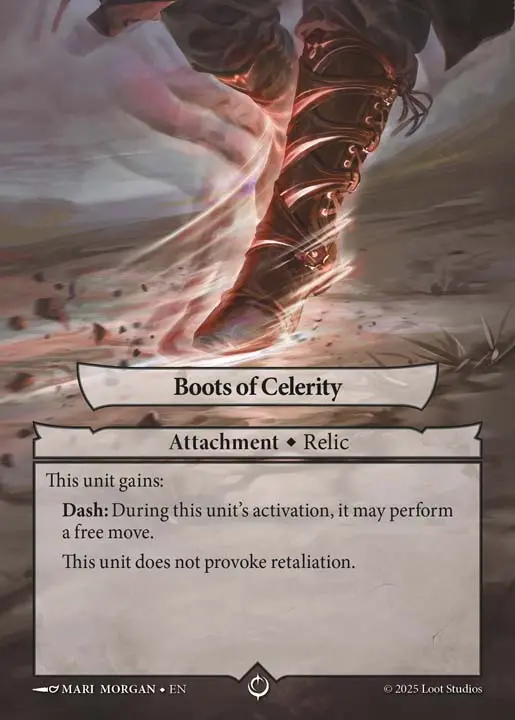
Boneclaw Raider functions like she comes pre-equipped with the Boots of Celerity. Dash plus nimble lets her attack and reposition in the same activation without inviting retaliation.
She is also able to reposition before charging to ensure an effective knockback angle into the Noxious Felshgardens.
She's the deck's relic-runner and backline harasser, flexible enough to grab an out-of-the-way relic turn one and arrive to target the weak support units in the back line.
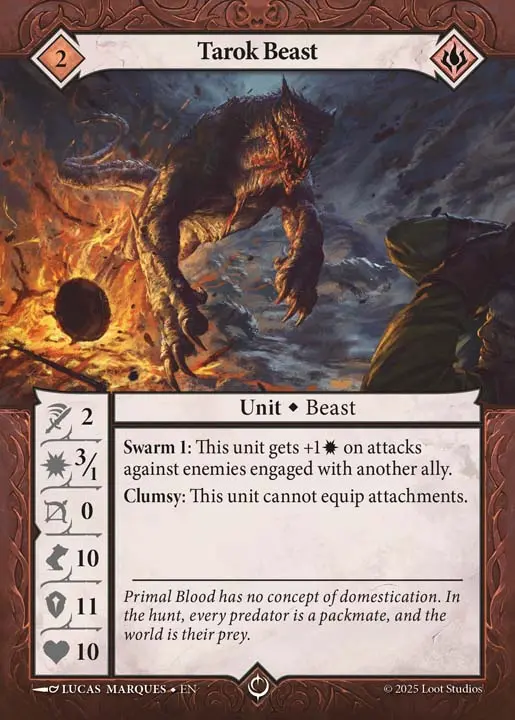
Tarok Beast is a strong contender for best all-around unit available to the deck, and a reliable way to deny and contest relics early. At 2 echo it is so efficient and fast that there is never a downside to playing it and harassing your opponent’s units.
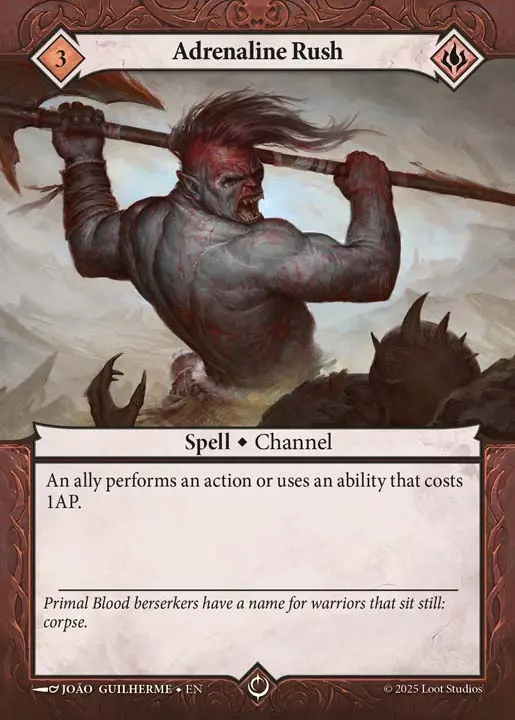
Adrenaline Rush solves the deck's real bottleneck, action points, and the deck rarely runs short on the echo to cast it thanks to how cheap most of its units are.
Setting up a strong charge and following it up with Adrenaline Rush is a great way to ensure your opponent’s unit is defeated.
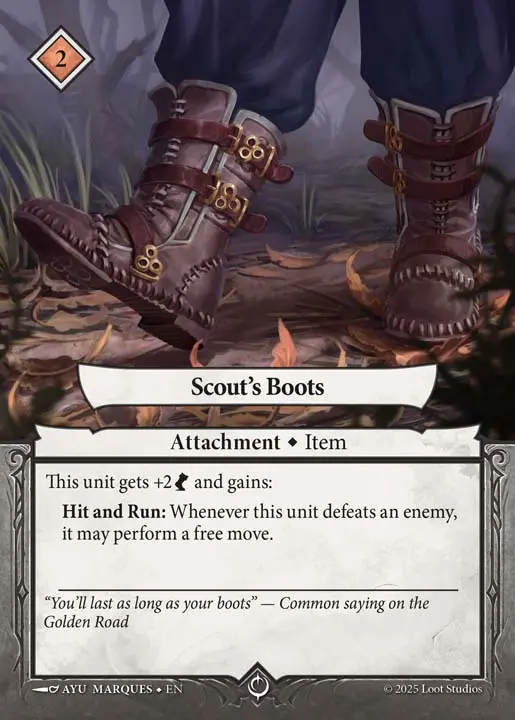
Items don’t get a ton of love these days, but Scouts Boots are the single best pairing with Cleave in the deck. FAQ-confirmed: each kill this activation resolves its own Hit and Run, so a charge that kills two things in a row gets two separate free moves.
Thundersteps can chain two kills into 16 inches of extra movement and still have another Cleave trigger to resolve. This opens the door to wipe out an opponent’s back line of support units in a single activation.
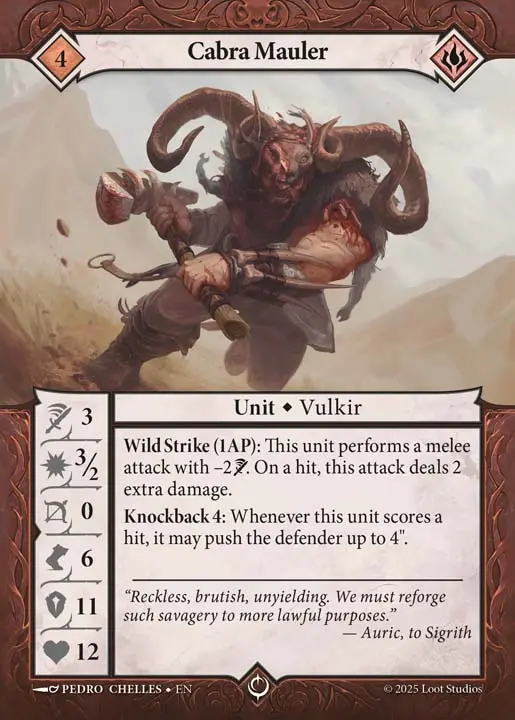
The Cabra Mauler's Wild Strike is always worth using. It trades 10% of accuracy (60% → 50% to hit) for +2 damage on a hit. It is a guaranteed floor and with a higher ceiling.
Run the numbers and the average damage per attack without Wild Strike is 2.6 damage and with it is 3.5 damage, a 34.6% increase.
The Cabra Mauler is the deck’s second workhorse behind the tarok beast, while not as efficient, it is still a strong unit that can push your gameplan forward.
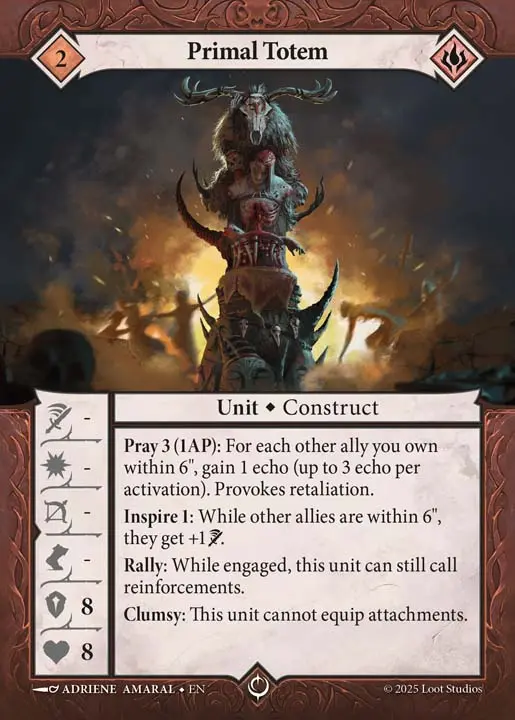
One deckbuilding note worth flagging: Primal Totems function like spells, not units, for planning purposes. They can't move, attack, or do anything a unit does, they exist to hand you a free activation.
Count them as spells when you're sanity-checking your unit count, or your draws will lie to you about how many real bodies you actually have on the board.
At the end of the day if there is not an opportunity to play them, they make a great card to discard to Relentless Surge for an extra 3 inches of movement. - Thanks VictusDrake for this insight, you can find him on the Malediction discord in the Thundersteps chat.
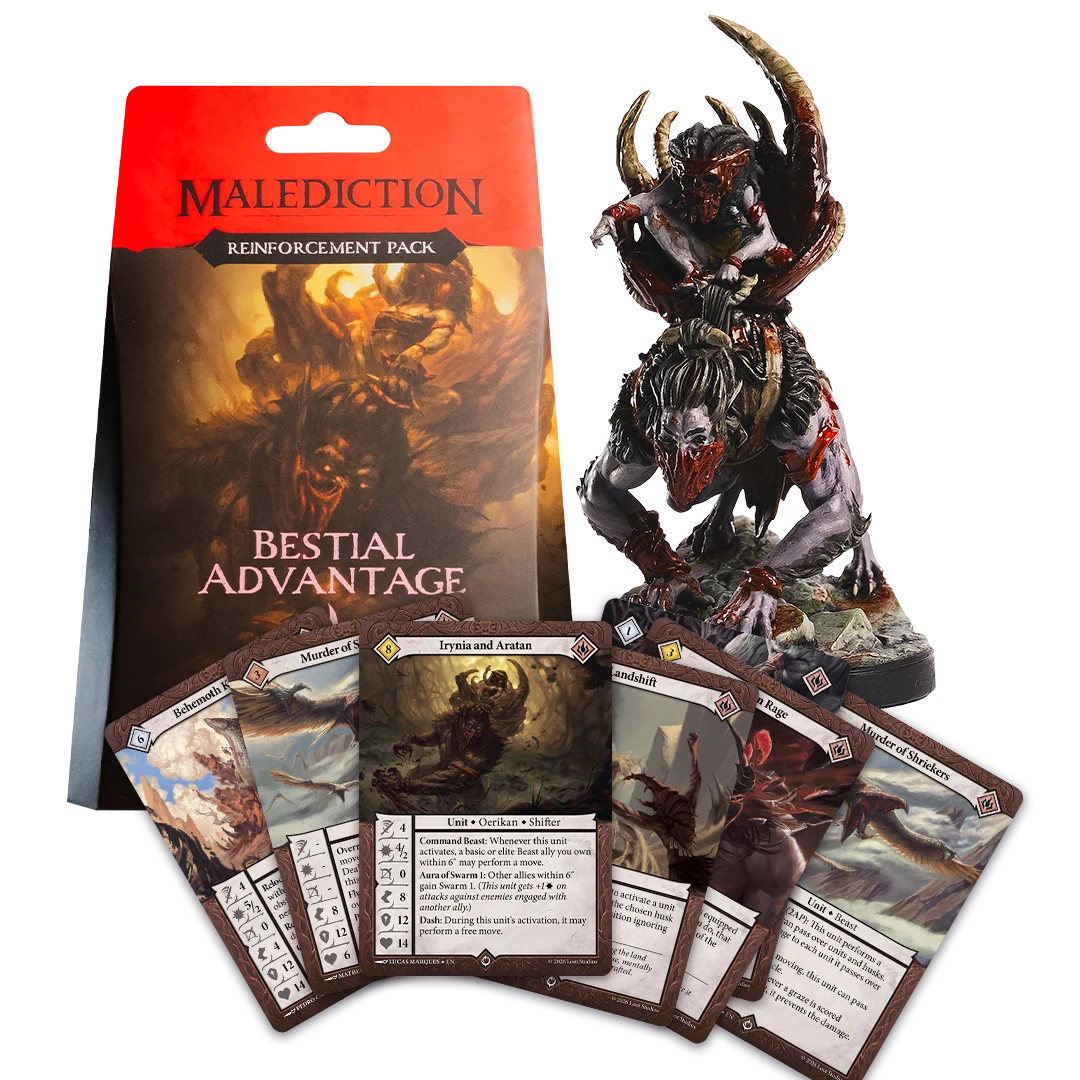
Thundersteps has a very clear gameplan, maximum aggression and pressure through surgical execution. That means a good balance of strong units and spells that help achieve the gameplan. If you are looking for a great upgrade path, the Bestial Advantage reinforcement pack is a great option.
If you just bought Thundersteps and want to make the deck a bit more effective here is an upgraded decklist that does just that without breaking the bank.
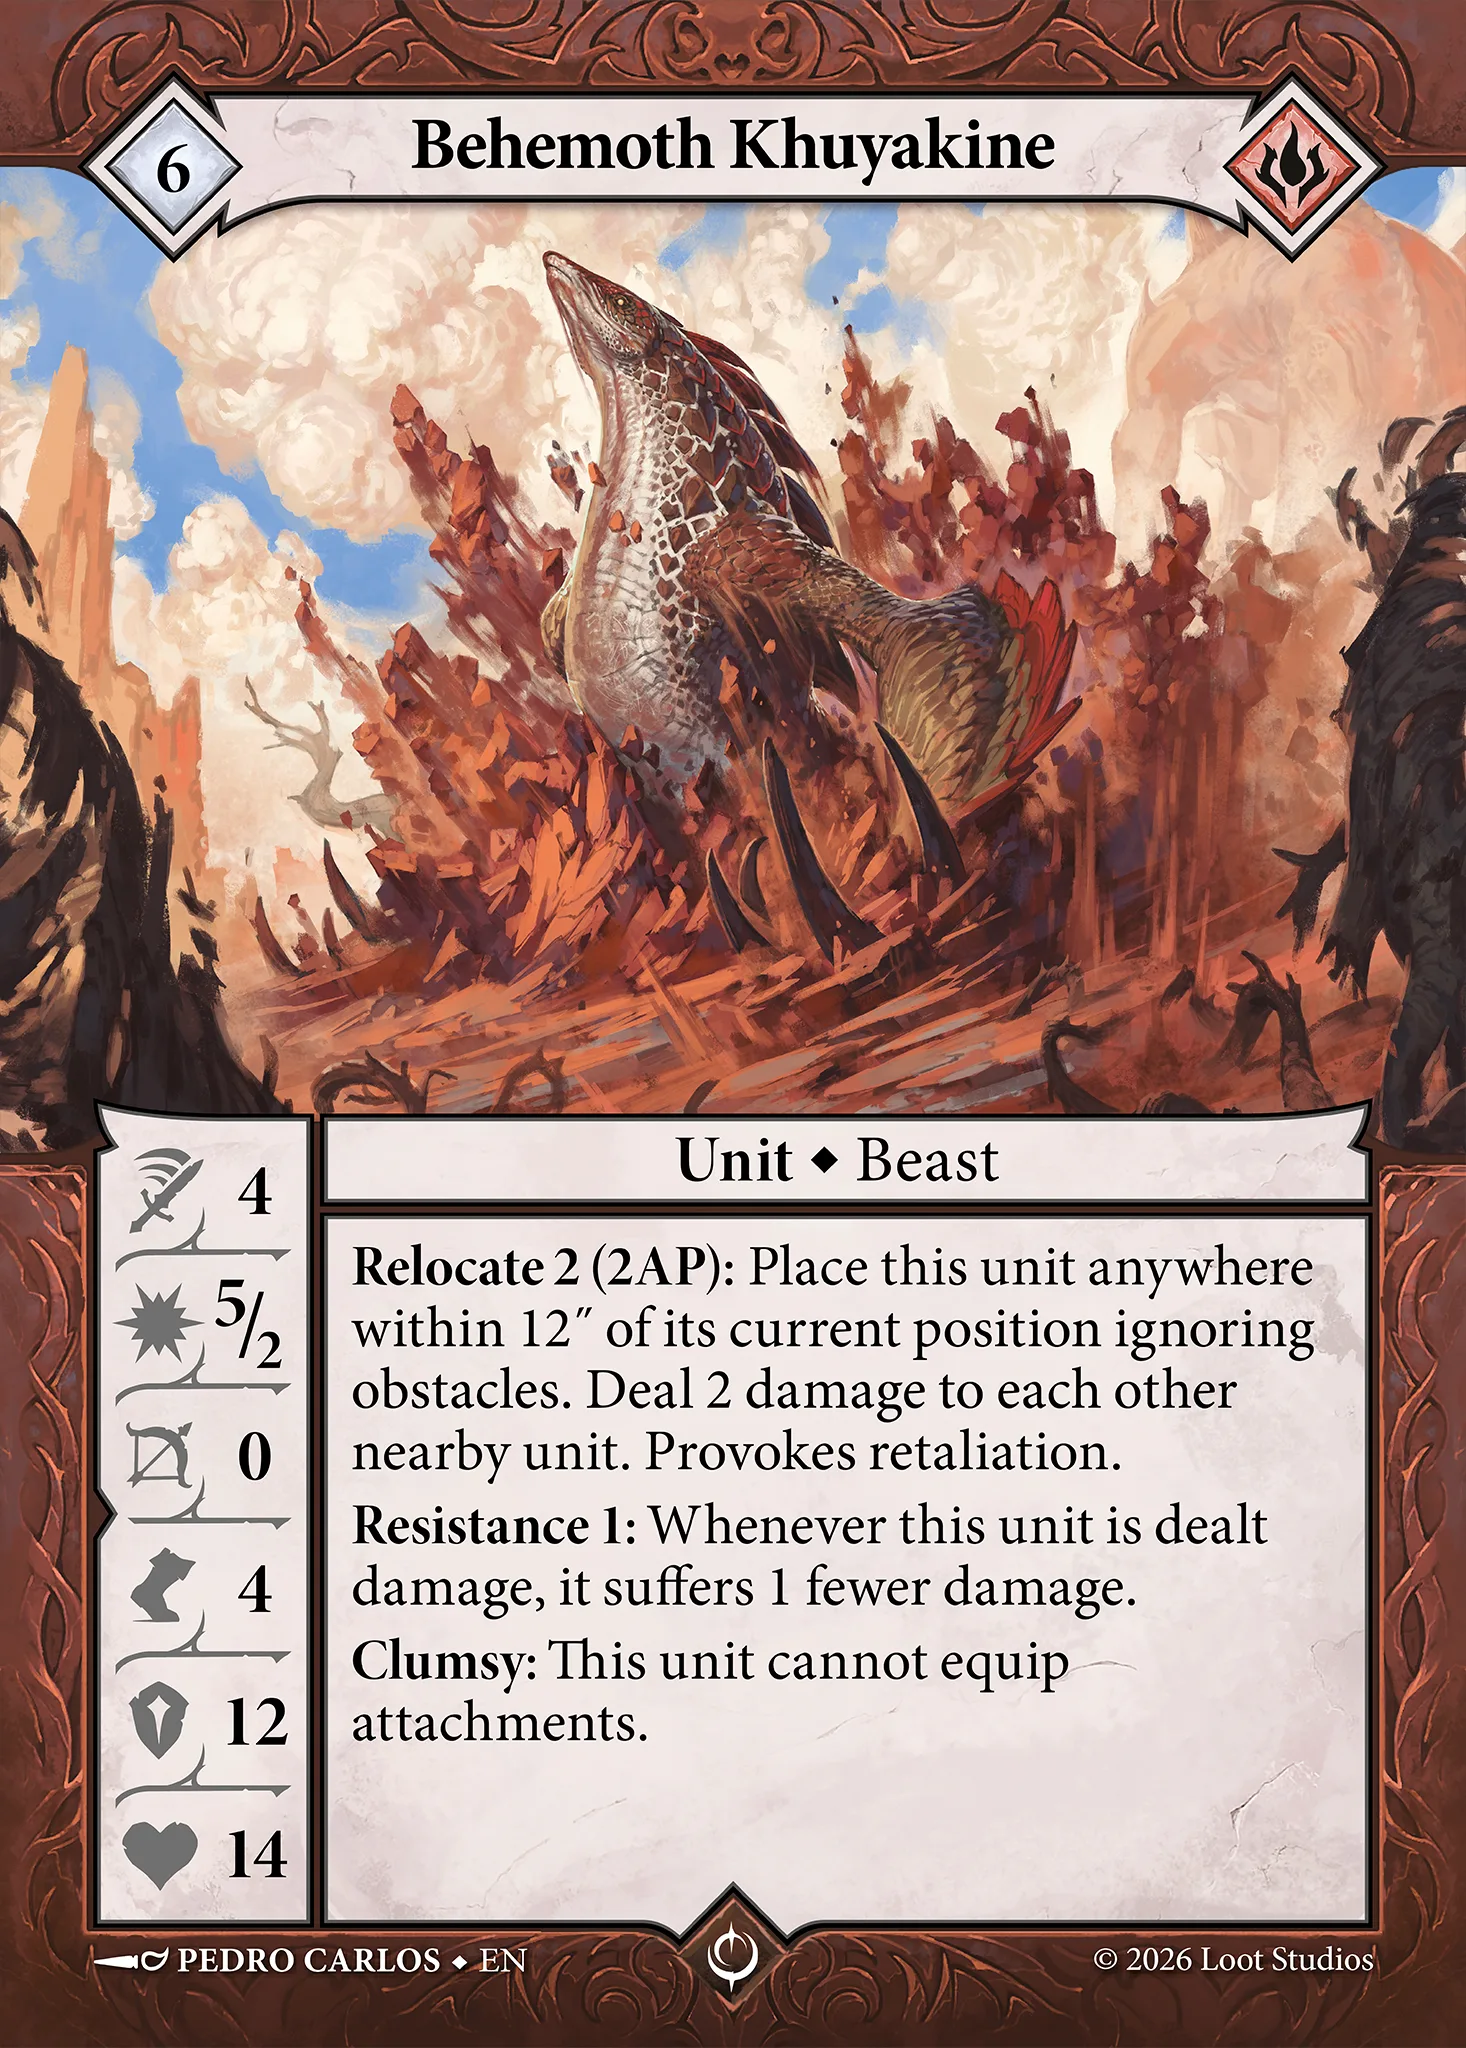
Behemoth Khuyakine is an elite beater that can also take a hit well. Resistance 1 and 14 HP allow this unit to survive a lot longer than others. Its Relocate ability is a nightmare for backline support units.
The only downside to this unit is its movement of 4 inches. It means charges will need to be more planned out and you may be better off deploying it in turn 2, when your other units are further up the board.
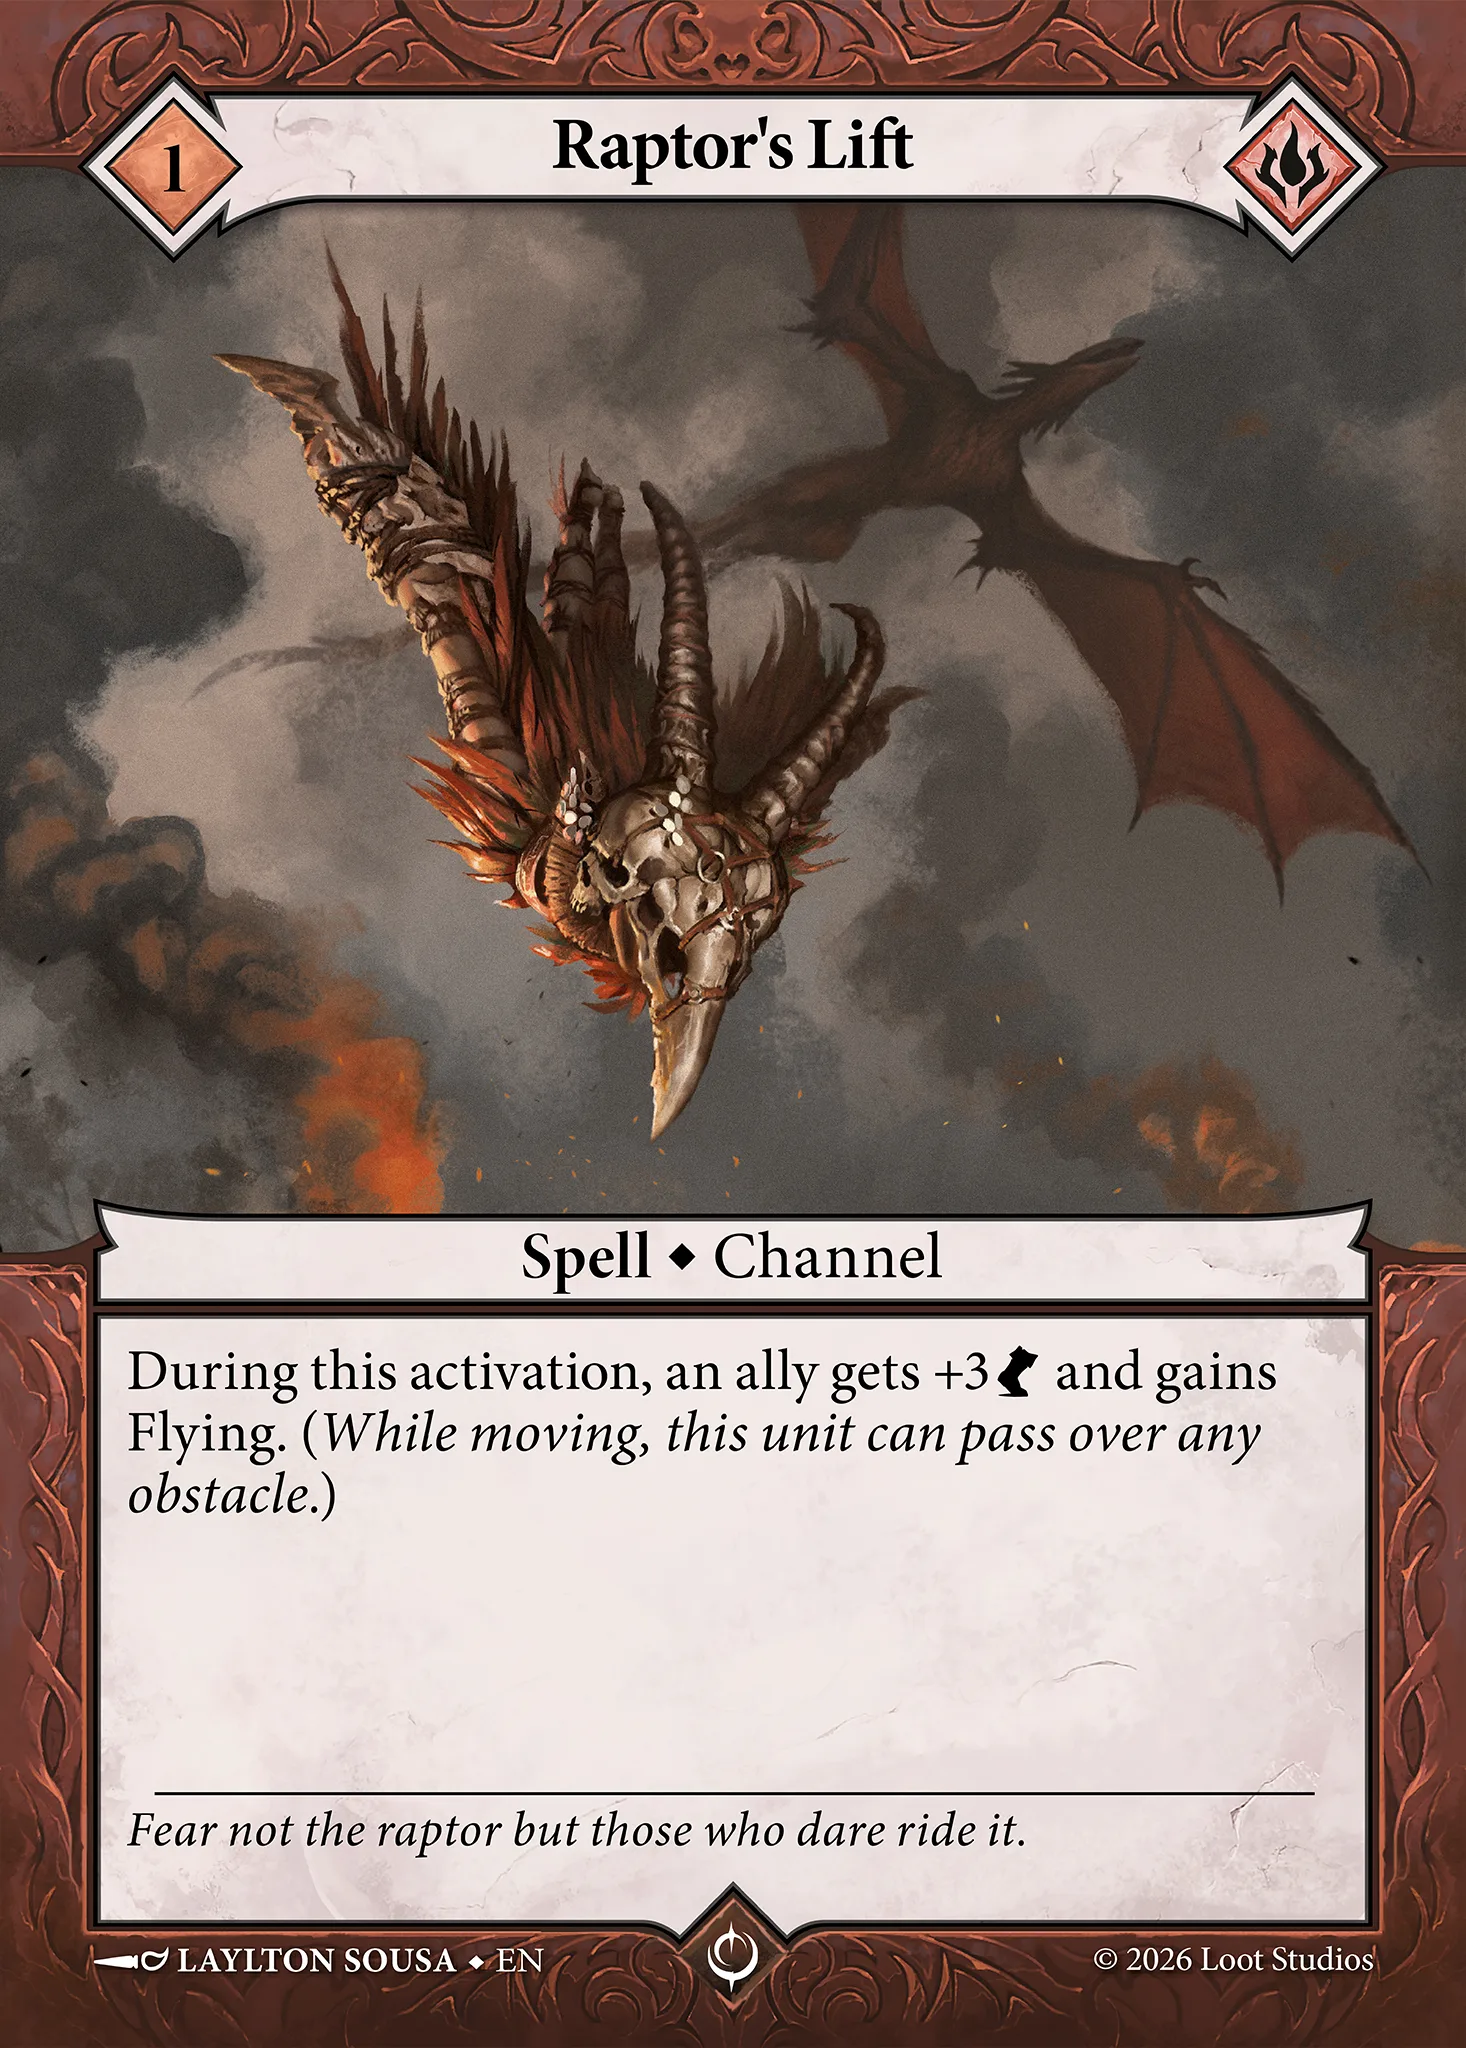
Raptor's Lift is an interesting card, on the surface it seems super useful for Thundersteps, but not in the manner most people think.
Gaining flying for a charge is not as impactful as one may think. You need line of sight (LOS) to the target you want to charge. You cannot charge over terrain. Flying does not benefit you too much when making a charge then.
Where this card really shines is when your opponent blocks you from getting to their support units with some tankier units. You can use this card to fly over behind the enemy lines and now lock down their squishy support units for easy pickings.
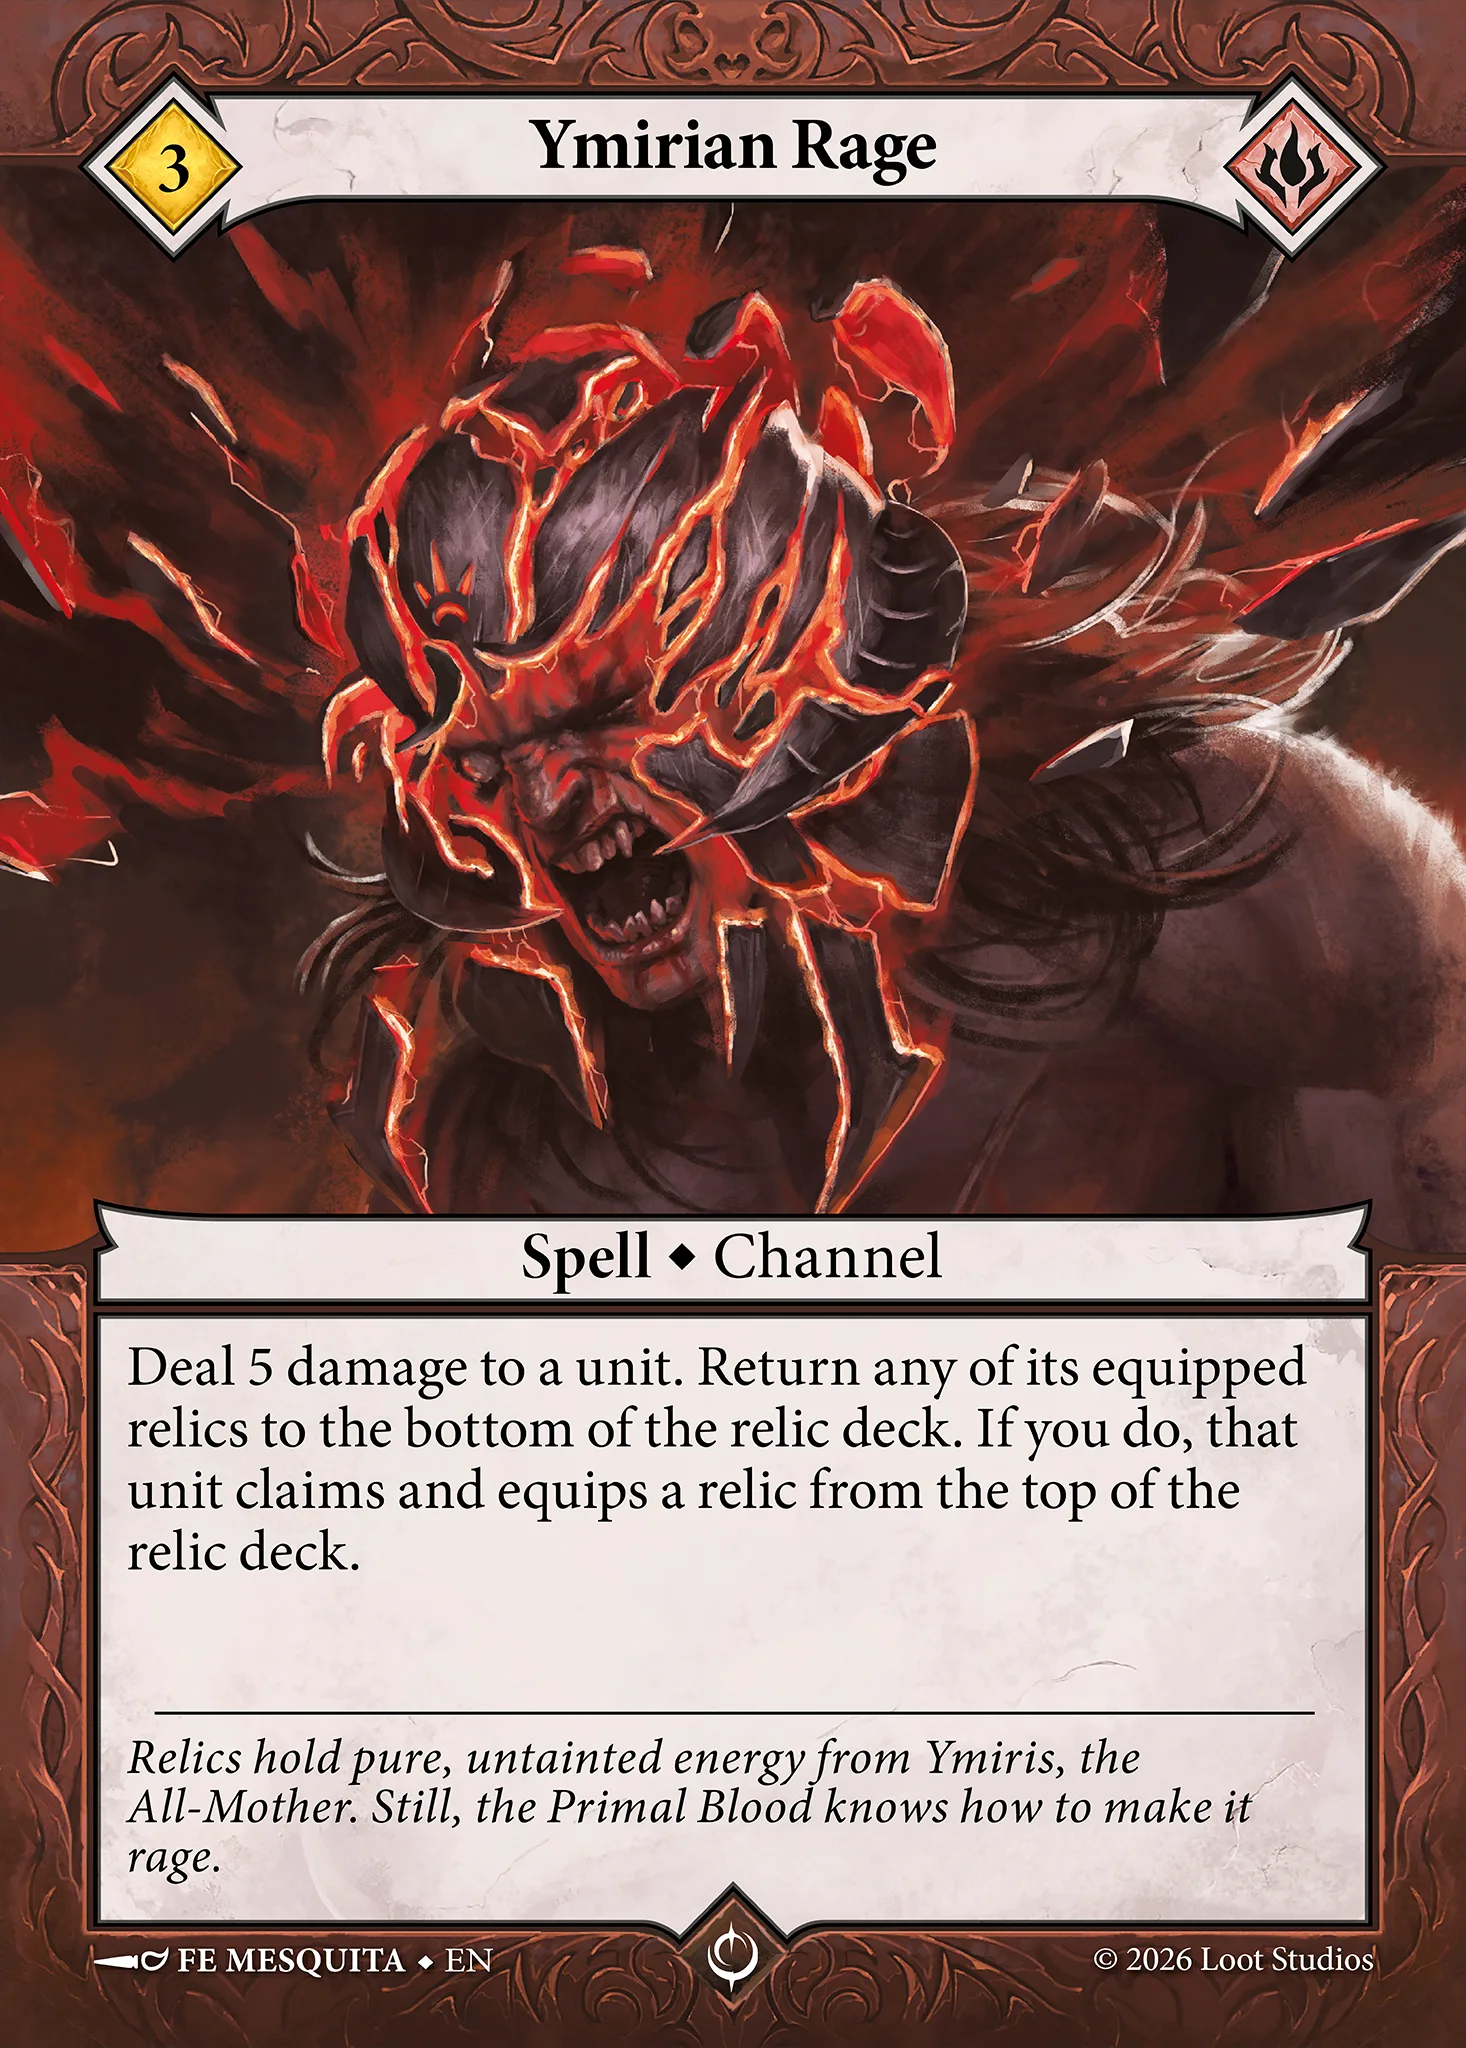
Ymirian Rage is a great card for Thundersteps. It allows you to soften up an enemy before Thundersteps attacks and help ensure Cleave is triggered to do more damage.
This is most effective when targeting units that have 12 or less health. It may be tempting to use this on tanky units, but don’t fall into that trap and instead use it on an enemy that Thundersteps or other units can finish off in one activation.
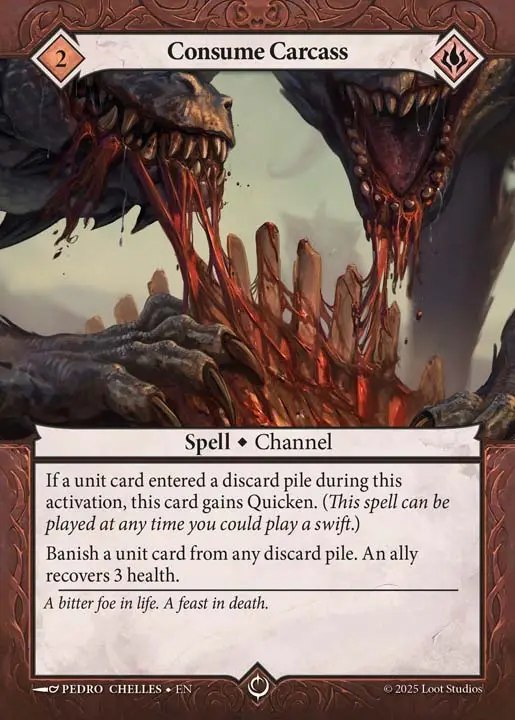
This card does not push your gameplan forward. It may be tempting to spend resources to heal Thundersteps, but if you are slowing down to heal your units your opponent can then take advantage of that breathing room and stabilize.
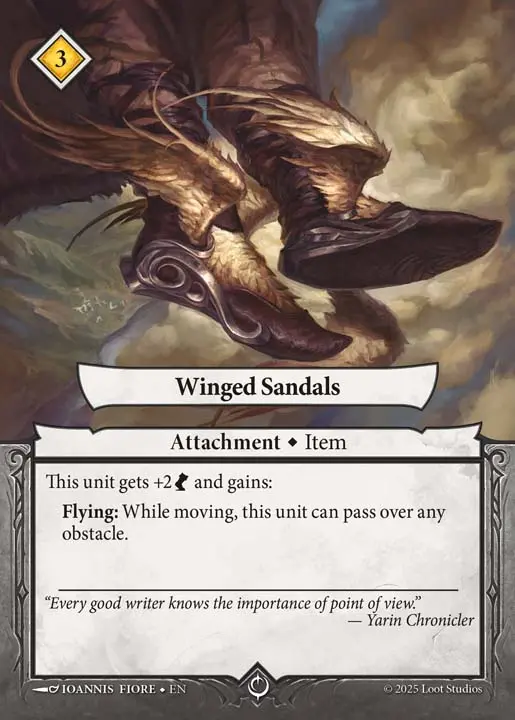
This card is not as good as it first seems. Giving flying to units is nice in niche situations, but it is not something you need every game and does not help your units charge better.
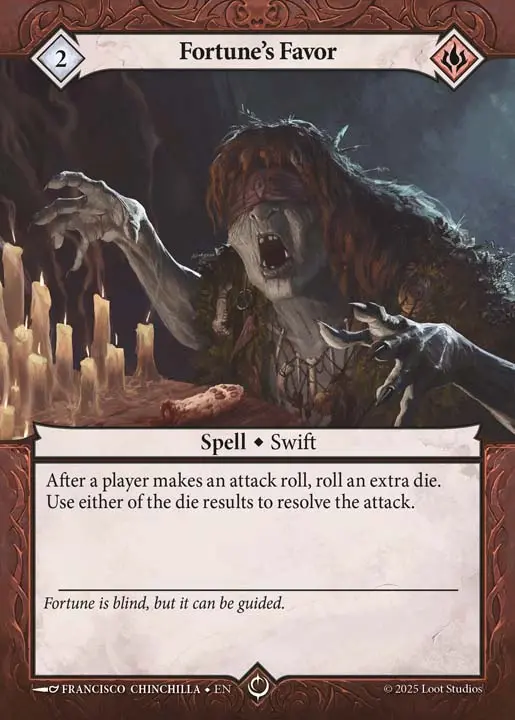
This card is fun, but not super effective. Spending 2 echo to have a 75% chance instead of 50% chance to hit is nice in theory. However it is only one single attack and it takes up a slot in your deck. You need to maximize your resources and that means cutting cards that don't guarantee results or are not very effective.
Don't even think about using this card to try to prevent your opponent from hitting Thundersteps.... Don't... Don't even think about it...
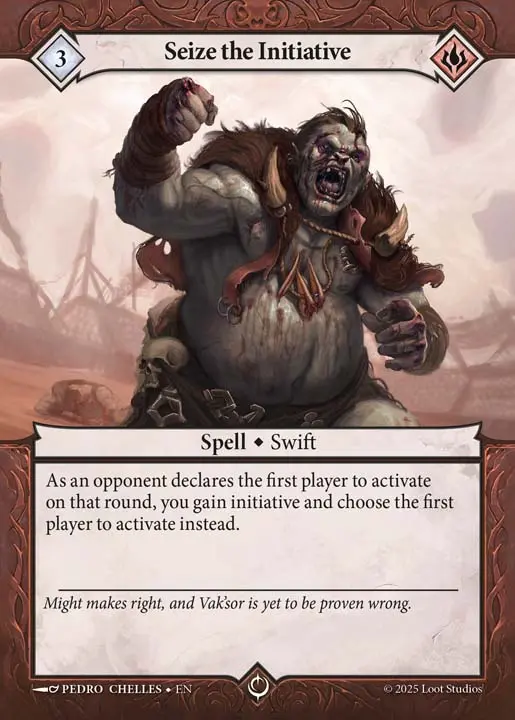
This card guarantees initiative, in some decks it may have a place. However, if you have planned your turns out well, activating second will not affect your results since you are trying to place your opponent in bad choice situations. Plus you can always bid for initiative if you really need to go first.
Here is an example of a decklist that pulls in cards from every possible release. You may end up tailoring it specific to your playstyle, but this is a good starting point that allows you to showcase Thundersteps' relentless aggression and pressure.
When building your Thundersteps deck play some test games. You may find you want to run different units depending on how you pick apart your opponent’s deck.
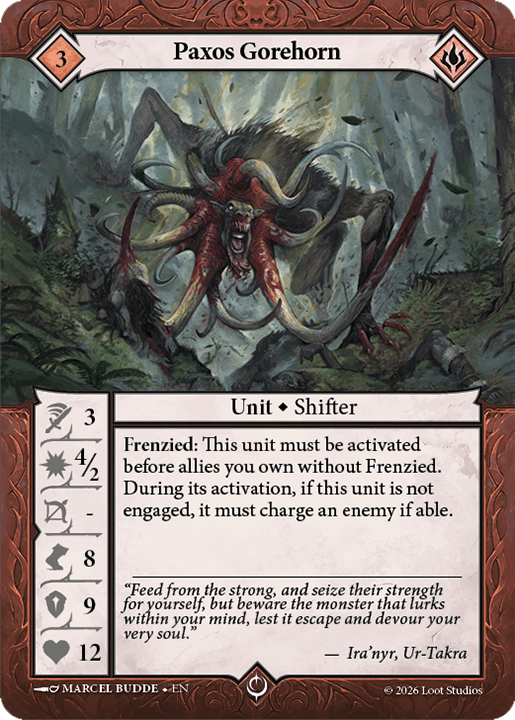
Paxos Gorehorn is a card worth mentioning in this upgraded decklist. The amount of damage output from this unit is incredible.
Frenzied may seem like a drawback, but it is very easy to mitigate the "must charge" rule by positioning him behind terrain or deploying a unit in front of him so no charge is legal anymore.
The only real downside to this unit is that he must be the first unit to activate. But if you have built your deck well and have a clear strategy it should not matter much which unit activates at the start of the round. You will be killing your opponent's units no matter what.
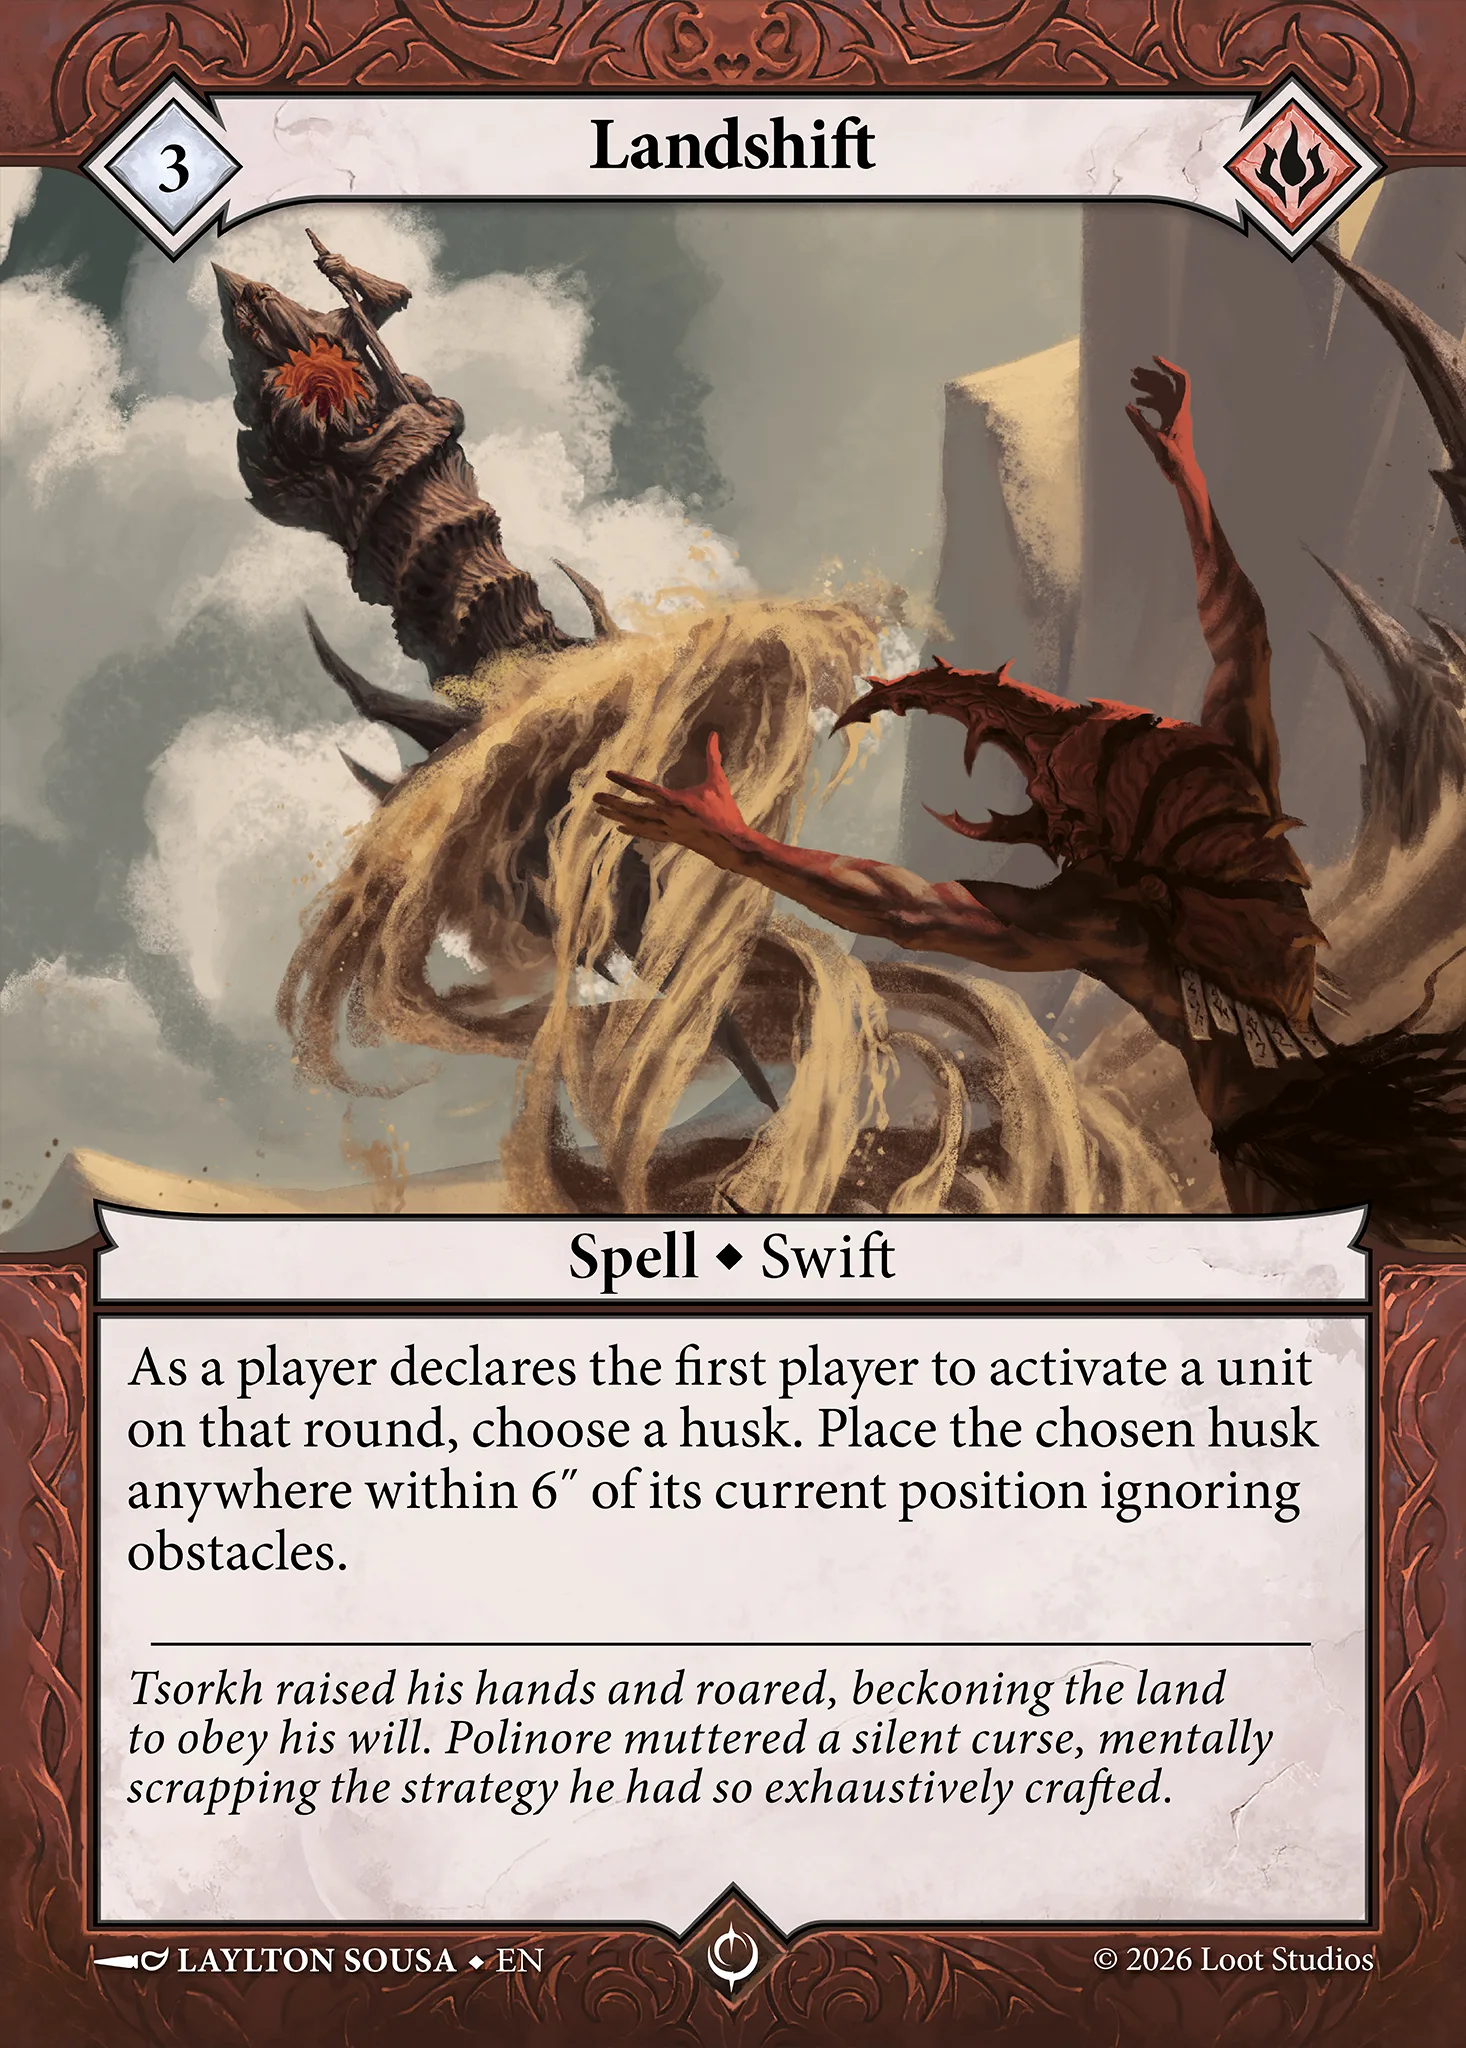
Landshift is a really cool card in the sideboard. You can bring this in against opponents that want to turtle up like Londriel and Sigrith. This forces them to either spend extra turns or effort to get to a husk or to come closer to you.
This fits well in Thundersteps since if you draw it late in the game you can discard it to Thundersteps' legacy to move an extra 3 inches.
The single highest-value habit to build is not forgetting your own Legacy. Relentless Surge's 3" discard-move gets forgotten by opponents constantly. They measure your charge range, confirm you're out of it, and then get surprised when you close the gap anyway. Use that.
Don't treat Noxious Fleshgardens as strictly your opponent's problem. A deliberate charge straight through it, at a moment your opponent isn't expecting, can trigger Berserk on your own terms rather than waiting for combat to get you there.
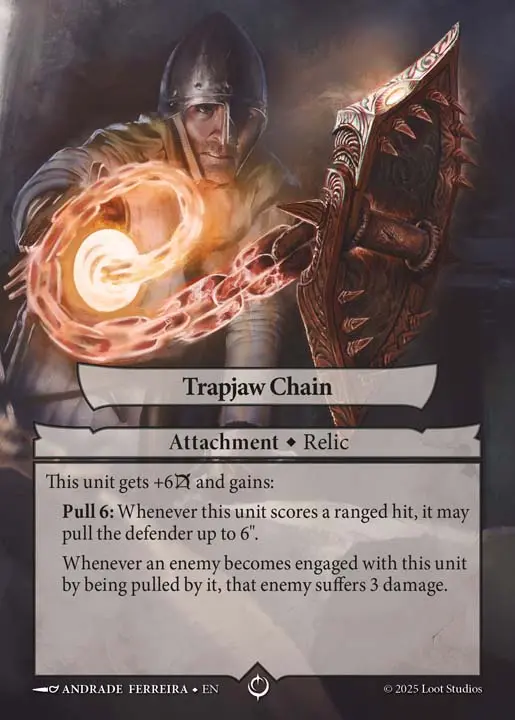
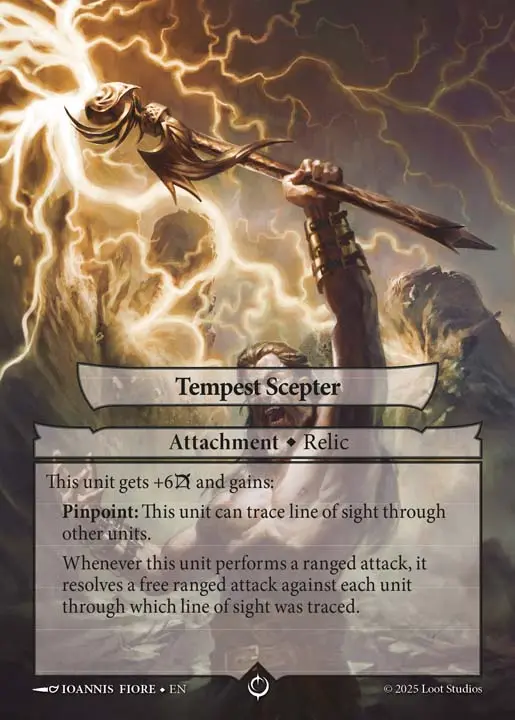
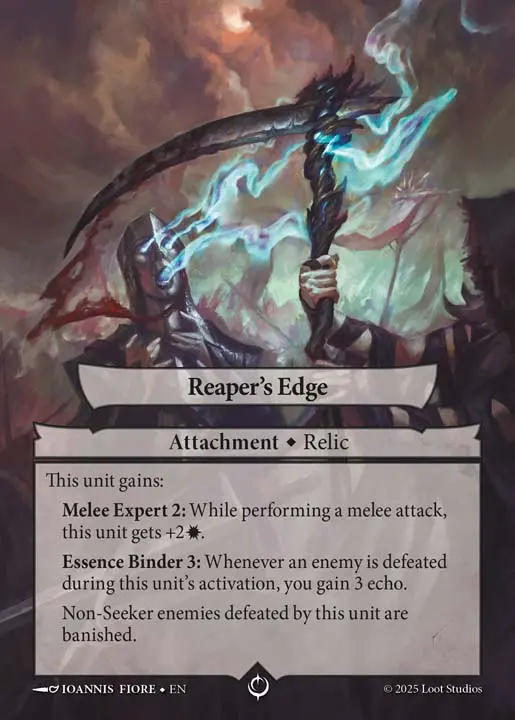
Do not be afraid to grab these ranged relics for Thundersteps. Pulling in units from 6 inches away dealing them 7 + 3 damage with the Trapjaw Chain is not something to shrug off. It and the Tempest Scepter increase his threat range by 6 inches, which on a seeker that deals 7 damage, is very scary.
Finally, remember the Scouts Boots plus Cleave interaction is fully stacking, not a one-time bonus, every kill in the activation resolves its own free move, so a two-kill charge is two separate repositions, confirmed by FAQ ruling. Plan your charge angle around getting to use both of them, not just the first.
Thundersteps is exactly what a "beginner-friendly" seeker needs to be: simple enough to win with on day one, and deep enough to reward the players who go back to him once they understand the game better.
He isn't just a stat check, but also a math problem disguised as a barbarian.
If piloted well he rewards knowing exactly how many hits something takes, exactly how much mastery it's worth, and exactly when to swing.
The more experienced you become the faster you can do the math required to get you to 40 mastery by turn 2 or 3.
Try him out, play some test games. Talk through some lines with your opponent so you can start seeing the best options in a game. Thundersteps is a great seeker to help you learn the game better and level up your play.
If you want to read more about other Seekers you can here:
Polinore Gets Results. Now He Gets Upgrades.
In'Gor, the Spiritbound: Malediction’s First Combo Deck
These findings are hereby entered into the Grand Archive.